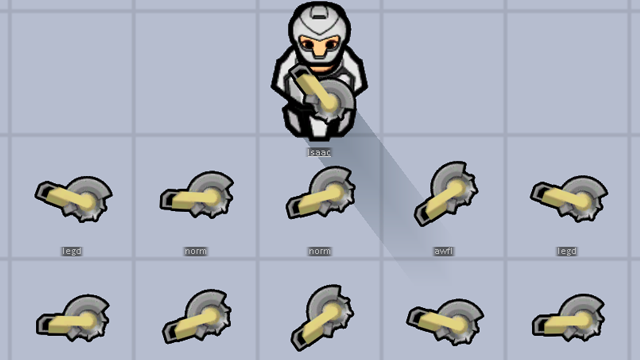
Basic Ranged Weapon
This is a basic RimWorld mod tutorial for the purpose of creating a simple ranged weapon using only XML. Be sure to check out the basic melee weapon tutorial as well.
Goals
- Create a new saw launcher item, a ranged weapon
- Give it a custom projectile with a custom damage type
- Give it custom melee and ranged sound effects
Recommended Reading
Sample Repository
A working implementation of this mod can be found in this GitHub repository. You can use it to compare against your work or as a basis for modification!
Folder Setup
First, you will want to create the files and folders necessary for this mod:
Mods
└ MyModFolder
  ├ About
  │ ├ About.xml
  │ └ Preview.png
  ├ Defs
  │ ├ DamageDefs
  │ │ └ ExampleDamage_Ranged.xml
  │ ├ SoundDefs
  │ │ └ ExampleSounds_RangedWeapon.xml
  │ └ ThingDefs
  │   └ ExampleWeapons_Ranged.xml
  ├ Sounds
  │ └ ExampleMod
  │   ├ Example_SawLaunch.ogg
  │   └ Example_SawMelee.ogg
  └ Textures
    └ ExampleMod
      ├ Example_SawBlade.png
      └ Example_SawLauncher.png
Please check out the mod folder structure guide for more information about individual folders.
About.xml
Your About.xml is used to identify your mod to RimWorld; please see the About.xml reference page for more information. Be sure to replace "AuthorName" with your own name:
<?xml version="1.0" encoding="utf-8"?>
<ModMetaData>

  <!-- This is the internal identifier for your mod. -->
  <!-- It is recommended that you make it unique to as to avoid potential collisions with other authors; -->
  <!--     if Rimworld detects multiple mods with the same packageId then it will refuse to load all of them. -->
  <packageId>AuthorName.ExampleRangedWeapon</packageId>

  <!-- This is both the displayed name of your mod as well as the name used for patch targeting. -->
  <name>Example Ranged Weapon</name>

  <!-- Your name goes here. -->
  <author>AuthorName</author>

  <!-- These are the RimWorld game versions that your mod supports. -->
  <!-- It is recommended that you only list versions that you have explicitly tested to ensure they work, -->
  <!-- as even basic XML options can change between major versions of the game. -->
  <supportedVersions>
    <li>1.4</li>
  </supportedVersions>

  <!-- This is the description of your mod shown in both the vanilla mod manager as well as modded managers. -->
  <description>This is an example ranged weapon mod made for the RimWorld Wiki.</description>

</ModMetaData>
Sample Assets
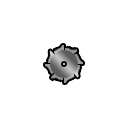
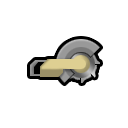
You can use these as the example assets:
Instructions
1. Create the weapon ThingDef
Our first step is to create the XML that represents our new weapon. Whenever possible, this is best accomplished by first copying a vanilla ThingDef and modifying it; in this case we will use the vanilla pump shotgun as our starting point, as it is the most similar existing weapon to what we want to create. The XML for the pump shotgun can be found in Data/Core/Defs/ThingDefs_Misc/Weapons/RangedIndustrial.xml.
In our own ExampleWeapons_Ranged.xml, we'll add the following content:
<?xml version="1.0" encoding="utf-8" ?>
<Defs>

  <!-- Example weapon: saw launcher -->
  <ThingDef ParentName="BaseHumanMakeableGun">
    <!-- pasted content omitted -->
  </ThingDef>

</Defs>
2. Modify the weapon ThingDef
In order to differentiate our weapon from the vanilla pump shotgun, we'll make the following changes:
| XML | Description |
|---|---|
<defName>ExampleGun_SawLauncher</defName> |
The |
<label>saw launcher</label> |
A ThingDef's label is its in-game name. Unless it is a proper name, it should be in lowercase so that it can be injected naturally into sentences that use it. RimWorld will automatically capitalize it as necessary if used in titles or as the start of a sentence. |
<description>A heavy industrial circular saw used for both construction and demolition.\n\nSome madman has modified this tool to allow its blades to be shot out at high velocity, rendering it a short-ranged but devastating weapon.</description> |
A ThingDef's description is used when inspecting the item's details. |
<graphicData> <texPath>ExampleMod/Example_SawLauncher</texPath> <graphicClass>Graphic_Single</graphicClass> </graphicData> |
This is where define the texture of our weapon. Similar to how defNames must be unique across all mods, the For ranged weapons such as our saw launcher, the texture defined in our |
<costList> <Steel>80</Steel> <ComponentIndustrial>4</ComponentIndustrial> </costList> |
Since our saw launcher is a more complex tool than the pump shotgun with more functionality, we will have it cost 80 steel and 4 [[components]. |
<statBases> <WorkToMake>15000</WorkToMake> <Mass>9.9</Mass> <AccuracyTouch>0.85</AccuracyTouch> <AccuracyShort>0.80</AccuracyShort> <AccuracyMedium>0.70</AccuracyMedium> <AccuracyLong>0.56</AccuracyLong> <RangedWeapon_Cooldown>1.8</RangedWeapon_Cooldown> </statBases> |
Our saw launcher requires more time to craft than a pump shotgun, weighs far more, has lower accuracy at range, and has a longer recovery cooldown duration. |
<equippedStatOffsets> <ConstructionSpeed>0.10</ConstructionSpeed> </equippedStatOffsets> |
While there is no |
<verbs>
  <li>
    <verbClass>Verb_Shoot</verbClass>
    <hasStandardCommand>true</hasStandardCommand>
    <defaultProjectile>ExampleBullet_SawBlade</defaultProjectile>
    <warmupTime>1.2</warmupTime>
    <range>12.9</range>
    <soundCast>ExampleWeapon_SawLauncher</soundCast>
    <soundCastTail>GunTail_Heavy</soundCastTail>
    <muzzleFlashScale>0</muzzleFlashScale>
  </li>
</verbs>
|
The |
<tools>
  <li>
    <label>handle</label>
    <capacities>
      <li>Blunt</li>
    </capacities>
    <power>9</power>
    <cooldownTime>2</cooldownTime>
  </li>
  <li>
    <label>blade</label>
    <capacities>
      <li>Demolish</li>
    </capacities>
    <power>13</power>
    <cooldownTime>2</cooldownTime>
    <soundMeleeHit>ExampleWeapon_SawLauncherMelee</soundMeleeHit>
    <soundMeleeMiss>ExampleWeapon_SawLauncher</soundMeleeMiss>
  </li>
</tools>
|
To better model our saw launcher's primary use as a demolition tool, we will change the Also note that we set custom |
<recipeMaker>
  <skillRequirements>
    <Crafting>5</Crafting>
  </skillRequirements>
  <displayPriority>436</displayPriority>
</recipeMaker>
|
Our saw launcher will have the same Crafting skill requirement as the pump shotgun, and we will place it just after the chain shotgun in the crafting recipe list. |
4. Create and modify the projectile ThingDef
Now we need to create the ThingDef that defines our weapon's projectile. Similarly to the weapon itself, we will copy the pump shotgun's Bullet_Shotgun projectile, which is immediately after the weapon's ThingDef in the same file:
<!-- Example projectile: saw blade -->
<ThingDef ParentName="BaseBullet">
  <!-- pasted content omitted -->
</ThingDef>
Now, we will modify the following:
| XML | Description |
|---|---|
<defName>ExampleBullet_SawBlade</defName> |
Since the projectile itself is a |
<label>saw blade</label> |
While the |
<graphicData> <texPath>ExampleMod/Example_SawBlade</texPath> <graphicClass>Graphic_Single</graphicClass> </graphicData> |
In the |
<projectile> <damageDef>ExampleDamage_Saw</damageDef> <damageAmountBase>25</damageAmountBase> <stoppingPower>1.5</stoppingPower> <armorPenetrationBase>0.19</armorPenetrationBase> <speed>55</speed> </projectile> |
Here we will specify the various values related to the damage dealt by this projectile upon impact. We will be using a custom |
5. Create and modify a DamageDef
Next, we need to create a custom DamageDef for our custom projectile, because none of our vanilla options are entirely accurate or appropriate for our use case. Unlike our previous two ThingDef entries, we will create this one entirely from scratch since it will be relatively simple. We will start by creating the following in our ExampleDamage_Ranged.xml file:
<?xml version="1.0" encoding="utf-8" ?>
<Defs>

  <!-- Example damage type: ranged cut -->
  <DamageDef ParentName="Arrow">

    <!-- further tags will go here -->

  </DamageDef>

</Defs>
The reason we want to use Arrow as our parent is because the vanilla Arrow damage type already does most of what we want: it is a ranged damage type for purposes of shield belt penetration, it inflicts Cut injuries, and it is opposed by Sharp armor. This means we only have to add the following overrides to customize our new damage type:
| XML | Description |
|---|---|
<defName>ExampleDamage_Saw</defName> |
As always, we need to ensure our |
<label>saw</label> |
This label will be seen in the damage breakdown for our weapon and projectile stat cards. All the usual recommendations for |
<deathMessage>{0} has been sliced to death by a saw blade.</deathMessage>
|
Our |
6. Create custom SoundDefs
We're almost done! The last thing we need to do is to create the two custom SoundDef entries so our new weapon can have a unique melee and ranged attack sound effect. We will start by creating two SoundDef entries in our ExampleSounds_RangedWeapon.xml file:
<?xml version="1.0" encoding="utf-8" ?>
<Defs>

  <!-- Example sound: saw launcher firing -->
  <SoundDef>
    <defName>ExampleWeapon_SawLauncher</defName>

    <!-- configuration tags go here -->

  </SoundDef>

  <!-- Example sound: saw launcher melee -->
  <SoundDef>
    <defName>ExampleWeapon_SawLauncherMelee</defName>

    <!-- configuration tags go here -->

  </SoundDef>

</Defs>
ExampleWeapon_SawLauncher
The following tags go into our ExampleWeapon_SawLauncher SoundDef:
| XML | Description |
|---|---|
<context>MapOnly</context> |
Setting |
<subSounds>
  <li>
    <grains>
      <li Class="AudioGrain_Clip">
        <clipPath>ExampleMod/Example_SawLaunch</clipPath>
      </li>
    </grains>
    <volumeRange>40~45</volumeRange>
    <pitchRange>0.8940217~1.084783</pitchRange>
  </li>
</subSounds>
|
This is the meat of our The
|
ExampleWeapon_SawLauncherMelee
The following tags go into our ExampleWeapon_SawLauncherMelee SoundDef:
| XML | Description |
|---|---|
<context>MapOnly</context> |
As with the previous entry, we want this sound to only play on regular maps as well. |
<subSounds>
  <li>
    <grains>
      <li Class="AudioGrain_Clip">
        <clipPath>ExampleMod/Example_SawMelee</clipPath>
      </li>
    </grains>
    <volumeRange>45~50</volumeRange>
    <pitchRange>0.8940217~1.084783</pitchRange>
  </li>
</subSounds>
|
Our melee sound effect will be very similar to our ranged sound effect, but we will use a different grain clip and adjust the volume slightly higher, as the melee sound should be more impactful. |
7. Done!
Your first ranged weapon is complete! Boot up RimWorld and you should be able to see and enable the "Example Ranged Weapon" mod in your mod manager. You can then use dev mode tools to spawn the weapon directly, or craft it at a machining table.
If you get any errors, be sure to check out the troubleshooting guide or join us on the #mod-development channel on the RimWorld Discord server.


