Difference between revisions of "Events"
(→Types: improved grammar and) |
|||
| (956 intermediate revisions by 69 users not shown) | |||
| Line 1: | Line 1: | ||
<!--Top Nav Box--> | <!--Top Nav Box--> | ||
{| align=center | {| align=center | ||
| − | | {{ | + | | {{Gameplay Nav}} |
|} | |} | ||
| − | + | ---- | |
<!-- End of Nav --> | <!-- End of Nav --> | ||
| + | {{Stub|reason=Ideology events. Recover lost content from major rewrite OR revert to prior to rewrite}} | ||
| + | {{For|a guide to survive events|Events Guide}} | ||
| + | '''Events''' are driven by the currently selected [[AI Storytellers|AI storyteller]]. | ||
| − | + | Most events that occur create a [[Menu#Letters|Letter]], an envelope icon on the right side of the screen. Other events will pause the game and pop up a window where the player must make a choice. Usually, the color of the envelope will suggest the severity of the event; blue envelopes are good events, grey is neutral, yellow is bad, and red denotes direct threats. | |
| − | + | Many event titles are variable. They can mention location, pawn and faction names, specific buffs or debuffs, or even have countdowns for the time variable events. | |
| − | + | There's a special kind of events called [[Quests]] which work under different rules. | |
| − | =Event | + | {{TOCright}} |
| − | {| | + | == Event List <span class="mw-EventList_toggle" style="font-size:small; display:inline-block; float:right;"> </span> == |
| − | {| {{ | + | For ease of navigation, events are subdivided into 3 groups: Storyteller events, Incidental events, and World events. |
| − | ! | + | |
| + | <div id="mw-EventList_collapsible" class="mw-collapsible"> | ||
| + | |||
| + | === Storyteller events === | ||
| + | These events are controlled by the selected [[storyteller]]. Major and Weather events require at least the Builder [[difficulty]] to be able to trigger. | ||
| + | |||
| + | Due to wiki limitations, it isn't possible to link directly to a collapsed section. To address that, this toggle will open all relevant sections. | ||
| + | <div class="mw-customtoggle-Majorthreats mw-customtoggle-XWeather mw-customtoggle-RandomGood mw-customtoggle-RandomBad" style="display:inline-block;background:rgba(128,128,128,0.5);color:white;padding:10px;border-radius:5px;outline:none;user-select:none">{{Center|Click Here to Open/Close Storyteller categories}}</div> | ||
| + | |||
| + | {| class="wikitable sortable mw-collapsible" | ||
| + | |+ <span valign="top" style="white-space:nowrap" width="100">Storyteller events list</span> | ||
| + | |- | ||
| + | ! Event Name !! Category !! Location !! Favorability !! Duration !! Cooldown<br/> (days) !! Mood <br/>Related !! Notes | ||
| + | |- | ||
| + | | [[#Enemy_attack|Enemy attack]] || Major || Colony Map || || || || {{Cross}} || Also called "raids". | ||
| + | |- | ||
| + | | [[#Infestation|Infestation]] || Major || Colony Map || || Until destruction || || {{Cross}} || The event "Too Deep: Infestation" is unrelated. | ||
| + | |- | ||
| + | | [[#Wastepack_infestation|Wastepack infestations]] || Major || Colony Map || || Until destruction || || {{Cross}} || Requires [[Biotech]] {{BiotechIcon}}. Can also be triggered by destroyed Toxic Wastepacks. | ||
| + | |- | ||
| + | | [[#Manhunter_pack|Manhunter pack]] || Major || Colony Map || || 24-54 hours, or until destruction || || {{Cross}} || Animals are infected with scaria | ||
| + | |- | ||
| + | | [[#Psychic_wave|Psychic wave]] || Major || Colony Map || || Until affected animals are incapacitated or die || || {{Cross}} || There's a variant that affects a single animal, which is not considered a major threat. | ||
| + | |- | ||
| + | | [[#Crashed_ship_part|Crashed ship part]] || Major || Colony Map || || Until destruction || || {{Check}}<sup>1</sup> || 2 variants: Defoliator ship and Psychic ship. Only the latter affects mood. | ||
| + | |- | ||
| + | | [[#Mech_cluster|Mech cluster]] || Major || Colony Map || || Until Destruction || || {{Cross}} || Requires [[Royalty]] {{RoyaltyIcon}}. Can also be generated by Quests. | ||
| + | |- | ||
| + | | [[#Problem_causer|Problem causer]] || Major || World || || Until Destruction || || {{Check}}<sup>1</sup> || Requires [[Royalty]] {{RoyaltyIcon}}. 9 variants | ||
| + | |- | ||
| + | | [[#Flashstorm|Flashstorm]] || Weather || Colony Map || || 0.075 - 0.1 days || {{Center|15}} || {{Cross}} || | ||
| + | |- | ||
| + | | [[#Toxic_fallout|Toxic fallout]] || Weather || Colony Map || || 2.5 - 10.5 days || {{Center|90}} || {{Check}}<sup>2</sup> || [[Insectoids]]/[[Mechanoids]] are immune. | ||
| + | |- | ||
| + | | [[#Volcanic_winter|Volcanic winter]] || Weather || Colony Map || || 7.5 - 40 days || {{Center|140}} || {{Cross}} || | ||
| + | |- | ||
| + | | [[#Ambrosia_sprout|Ambrosia sprout]] || Random || Colony Map || Good || || || {{Cross}} || Limited to 6 biomes: [[Tropical rainforest]]/[https://rimworldwiki.com/wiki/Biomes#Tropical_swamp swamp], [[Temperate forest]]/[https://rimworldwiki.com/wiki/Biomes#Temperate_swamp swamp], [[Boreal forest]], [[Arid shrubland]] | ||
| + | |- | ||
| + | | [[#Animals_join|Animals join]] || Random || Colony Map || Good || || || {{Cross}} || | ||
| + | |- | ||
| + | | [[#Animal_self-tamed|Animal self-tamed]] || Random || Colony Map || Good || || || {{Cross}} || | ||
| + | |- | ||
| + | | [[#Aurora|Aurora]] || Random || Colony Map || Good || 0.125 - 0.35 days || || {{Check}} || | ||
| + | |- | ||
| + | | [[#Cargo_pods|Cargo pods]] || Random || Colony Map || Good || || || {{Cross}} || | ||
| + | |- | ||
| + | | [[#Herd_migration:_.28Animal.29|Herd migration: (Animal)]] || Random || Colony Map || Good || || || {{Cross}} || Only happens on 5 biomes: [[Sea ice]], [[Ice sheet]], [[Tundra]], [[Desert]], [[Extreme desert]] | ||
| + | |- | ||
| + | | [[#Party|Party]] || Random || Colony Map || Good || || || {{Check}} || Requires a [[party spot]] or any gathering spot | ||
| + | |- | ||
| + | | [[#Psychic_soothe|Psychic soothe]] || Random || Colony Map || Good || || {{Center|15}} || {{Check}} || | ||
| + | |- | ||
| + | | [[#.28Trader type.29|(Trader type)]] || Random || Colony Map || Good || || || {{Cross}} || Orbital Trader | ||
| + | |- | ||
| + | | [[#.28Trader_type.29_from_.28Faction.29|(Trader type) from (Faction)]] || Random || Colony Map || Good || || || {{Cross}} || Land Trader | ||
| + | |- | ||
| + | | [[#Transport_pod_crash|Transport pod crash]] || Random || Colony Map || Good || || || {{Cross}} || | ||
| + | |- | ||
| + | | [[#Paralytic_abasia| Paralytic abasia]] || Random || Colony Map || Good || || || {{Cross}} || Requires [[Royalty]] {{RoyaltyIcon}}. Variant of "Transport pod crash" event | ||
| + | |- | ||
| + | | [[#Baby|Baby]] || Random || Colony Map || Good || || || {{Cross}} || Requires [[Biotech]] {{BiotechIcon}}. Variant of "Transport pod crash" event | ||
| + | |- | ||
| + | | [[#Wanderer_joins|Wanderer joins]] || Random || Colony Map || Good || 24 hours || || {{Cross}} || | ||
| + | |- | ||
| + | | [[#Wild_.28wo.29man_wanders_in|Wild (wo)man wanders in]] || Random || Colony Map || Good || || || {{Cross}} || | ||
| + | |- | ||
| + | | [[#Traveler_Visit|Traveler Visit]] || Random || Colony Map || Good || || || {{Cross}} || | ||
| + | |- | ||
| + | | [[#Visitor.28s.29|Visitor(s)]] || Random || Colony Map || Good || || || {{Cross}} || | ||
| + | |- | ||
| + | | [[#Royal_Tribute_Collector|Royal Tribute Collector]] || Random || Colony Map || Good || || || {{Cross}} || Requires [[Royalty]] {{RoyaltyIcon}} | ||
| + | |- | ||
| + | | [[#Gauranlen_pod_sprout|Gauranlen pod sprout]] || Random || Colony Map || Good || || || {{Cross}} || Requires [[Ideology]] {{IdeologyIcon}} | ||
| + | |- | ||
| + | | [[#Polux_tree_sprout|Polux tree sprout]] || Random || Colony Map || Good || || || {{Cross}} || Requires [[Biotech]] {{BiotechIcon}} | ||
| + | |- | ||
| + | | [[#Beavers!|Beavers!]] || Random || Colony Map || Bad || || {{Center|30}} || {{Cross}} || | ||
| + | |- | ||
| + | | [[#Birthday|Birthday]] || Random || Colony Map || Bad || || || {{Cross}} || | ||
| + | |- | ||
| + | | [[#Blight|Blight]] || Random || Colony Map || Bad || || {{Center|30}} || {{Cross}} || | ||
| + | |- | ||
| + | | [[#Disease|Disease]] || Random || Colony Map || Bad || || || {{Cross}} || | ||
| + | |- | ||
| + | | [[#Eclipse|Eclipse]] || Random || Colony Map || Bad || 0.75 - 1.25 days || {{Center|15}} || {{Check}} || Only affects mood with the Precept{{IdeologyIcon}} [[Ideoligion#Meme-specific|Eclipse]] | ||
| + | |- | ||
| + | | [[#Heat_wave|Heat wave]] || Random || Colony Map || Bad || 1.5 - 3.5 days || {{Center|30}} || {{Cross}} || It requires a summer temperature above {{Temperature|20}} | ||
| + | |- | ||
| + | | [[#Cold_snap|Cold snap]] || Random || Colony Map || Bad || 1.5 - 3.5 days || {{Center|30}} || {{Cross}} || It requires a summer temperature between {{Temperature|0|15}} | ||
| + | |- | ||
| + | | [[#Mad_animal|Mad animal]] || Random || Colony Map || Bad || || || {{Cross}} || | ||
| + | |- | ||
| + | | [[#Psychic_drone|Psychic drone]] || Random || Colony Map || Bad || 0.75 - 1.75 days || {{Center|15}} || {{Check}} || | ||
| + | |- | ||
| + | | [[#Solar_flare|Solar flare]] || Random || Colony Map || Bad || 0.15 - 0.5 days || || {{Cross}} || Incompatible with Unnatural Darkness ([[Anomaly]] {{AnomalyIcon}}) | ||
| + | |- | ||
| + | | [[#Zzztt...|Zzztt...]] || Random || Colony Map || Bad || || {{Center|8}} || {{Cross}} || Cooldown does not apply to Short-circuits caused by snow/rain, | ||
| + | |- | ||
| + | | [[#Transport_pod_crash_.28Ghoul.29|Transport pod crash (Ghoul)]] || Random || Colony Map || Bad || || || {{Cross}} || Requires [[Anomaly]] {{AnomalyIcon}} | ||
| + | |- | ||
| + | | [[#Gray_pall|Gray pall]] || Random || Colony Map || Bad || || || {{Check}} || Requires [[Anomaly]] {{AnomalyIcon}} | ||
| + | |} | ||
| + | 1: Only one variant affects mood | ||
| + | |||
| + | 2: Only while outside | ||
| + | |||
| + | === Incidental events === | ||
| + | :{{For|a detailled list of these events|Events/Incidental}} | ||
| + | Rather than being triggered by [[AI Storytellers|storytellers]], these events come from various other mechanics. | ||
| + | |||
| + | {| class="wikitable sortable mw-collapsible" | ||
| + | |+ <span valign="top" style="white-space:nowrap" width="100">Incidental events list</span> | ||
| + | |- | ||
| + | ! Event Name !! Type !! Location !! Notes | ||
| + | |- | ||
| + | | [[Events/Incidental#Friendlies|Friendlies]] || Good || Colony Map || | ||
| + | |- | ||
| + | | [[Events/Incidental#Masterwork|Masterwork]] || Good || Colony Map || | ||
| + | |- | ||
| + | | [[Events/Incidental#Masterwork|Legendary work]] || Good || Colony Map || | ||
| + | |- | ||
| + | | [[Events/Incidental#Man_in_Black|Man in Black ]] || Good || Colony Map || Has a year (60 days) of cooldown. | ||
| + | |- | ||
| + | | [[Events/Incidental#New_recruit|New recruit]] || Good || Colony Map || | ||
| + | |- | ||
| + | | [[Events/Incidental#Meteorite|Meteorite]] || Good || Colony Map || About 1 year cooldown | ||
| + | |- | ||
| + | | [[Events/Incidental#Outpost_destroyed|Outpost destroyed]] || Good || World || Becomes "Faction Defeated" if that was the last outpost of said faction. | ||
| + | |- | ||
| + | | [[Events/Incidental#Ransom_.28Time remaining.29|Ransom (Time remaining)]] || Good || Colony Map || Available for 24 hours | ||
| + | |- | ||
| + | | [[Events/Incidental#Rare_thrumbos |Rare thrumbos ]] || Good || Colony Map || 13 days of cooldown | ||
| + | |- | ||
| + | | [[Events/Incidental#Reactor_ready|Reactor ready]] || Good || Colony Map || 15 days after warming up a ship reactor | ||
| + | |- | ||
| + | | [[Events/Incidental#Ship_chunks|Ship chunks]] || Good || Colony Map || | ||
| + | |- | ||
| + | | [[Events/Incidental#Trauma savant|Trauma savant]] || Good || Anywhere || | ||
| + | |- | ||
| + | | [[Events/Incidental#Quest_completed|Quest completed]] || Good || Anywhere || | ||
| + | |- | ||
| + | | [[Events/Incidental#Anima_tree_sprout |Anima tree sprout]] || Good || Colony Map || Requires [[Royalty]] {{RoyaltyIcon}} | ||
| + | |- | ||
| + | | [[Events/Incidental#Ancient_danger|Ancient danger]] || Bad || Colony Map || Once per map. | ||
| + | |- | ||
| + | | [[Events/Incidental#Animal_revenge |Animal revenge]] || Bad || Colony Map || | ||
| + | |- | ||
| + | | [[Events/Incidental#Death|Death]] || Bad || Anywhere || [[Orders#Slaughter|Slaughtering]] and Euthanizing a colonist does not trigger this. | ||
| + | |- | ||
| + | | [[Events/Incidental#Drug_addiction|Drug addiction]] || Bad || Anywhere || | ||
| + | |- | ||
| + | | [[Events/Incidental#Heart_attack|Heart attack]] || Bad || Anywhere || | ||
| + | |- | ||
| + | | [[Events/Incidental#Mental_Break|Mental Break]] || Bad || Anywhere || | ||
| + | |- | ||
| + | | [[Events/Incidental#Overdose|Overdose]] || Bad || Anywhere || | ||
| + | |- | ||
| + | | [[Events/Incidental#Predator_hunting|Predator hunting]] || Bad || Colony Map || Requires a predator on the map | ||
| + | |- | ||
| + | | [[Events/Incidental#Prison_break|Prison break]]|| Bad || Colony Map || Requires having prisoners | ||
| + | |- | ||
| + | | [[Events/Incidental#Roof_collapsed|Roof collapsed]] || Bad || Colony Map || | ||
| + | |- | ||
| + | | [[Events/Incidental#Too_Deep:_Infestation|Too Deep: Infestation]] || Bad || Colony Map || Triggered by deep drill | ||
| + | |- | ||
| + | | [[Events/Incidental#Allied:_.28Faction.29|Allied: (Faction)]] || Faction || Anywhere || Requires to improve relations <-75 | ||
| + | |- | ||
| + | | [[Events/Incidental#Enemy_now_neutral:_.28Faction.29|Enemy now neutral: (Faction)]] || Faction || Anywhere || | ||
| + | |- | ||
| + | | [[Events/Incidental#Hostile_faction|Hostile faction]] || Faction || Anywhere || Requires to worsen relations >75 | ||
| + | |- | ||
| + | | [[Events/Incidental#Leader_died|Leader died]] || Faction || Anywhere || Triggers on another faction's leader death. | ||
| + | |- | ||
| + | | [[Events/Incidental#New_Leader|New Leader]] || Faction || Anywhere || Trigger once recruiting another faction's leader. | ||
| + | |- | ||
| + | | [[Events/Incidental#About:_Electricity|About: Electricity]] || Informational || Anywhere || | ||
| + | |- | ||
| + | | [[Events/Incidental#About:_Getting_advanced_components|About: Getting advanced components ]] || Informational || Anywhere || | ||
| + | |- | ||
| + | | [[Events/Incidental#About:_Launching_the_ship|New About: Launching the ship]] || Informational || Anywhere || | ||
| + | |- | ||
| + | | [[Events/Incidental#Persona_Core_Offer|Persona Core Offer]] || Informational || Anywhere || Requires >40 goodwill with some faction | ||
| + | |- | ||
| + | | [[Events/Incidental#Summer|Summer]] || Informational || Anywhere || | ||
| + | |- | ||
| + | | [[Events/Incidental#Unwaveringly_loyal|Unwaveringly loyal]] || Informational || Anywhere || | ||
| + | |- | ||
| + | | [[Events/Incidental#About:_Anima_tree_linking|About: Anima tree linking]] || Informational || Anywhere || Requires [[Royalty]] {{RoyaltyIcon}} | ||
| + | |- | ||
| + | | [[Events/Incidental#Baby_Prep|Baby Prep]] || Informational || Anywhere || Requires [[Biotech]] {{BiotechIcon}} | ||
|- | |- | ||
| − | + | | [[Events/Incidental#New_lovers|New lovers]] || Social || Anywhere || Affects mood | |
|- | |- | ||
| − | + | | [[Events/Incidental#Breakup|Breakup]] || Social || Anywhere || Affects mood | |
|- | |- | ||
| − | + | | [[Events/Incidental#Rejected_proposal|Rejected proposal]] || Social || Anywhere || Affects mood | |
|- | |- | ||
| − | + | | [[Events/Incidental#Marriage_is_on.21|Marriage is on!]] || Social || Anywhere || Affects mood | |
|- | |- | ||
| − | + | | [[Events/Incidental#Affair|Affair]] || Social || Anywhere || Affects mood | |
|- | |- | ||
| − | + | | [[Events/Incidental#Divorce|Divorce]] || Social || Anywhere || Affects mood | |
| + | |} | ||
| + | |||
| + | === World events === | ||
| + | :{{For|a guide to survive these events|World Quests Guide}} | ||
| + | This is a list of all events that can happen while on the overworld. Some events require a quest to trigger. Sub events are not quest events on their own, but may happen during other world events such as Incapacitated Refugee or Item Stash Opportunity. | ||
| + | |||
| + | Due to wiki limitations, it isn't possible to link directly to a collapsed section. To address that, this toggle will open all relevant sections. | ||
| + | <div class="mw-customtoggle-WorldEvents" style="display:inline-block;background:rgba(128,128,128,0.5);color:white;padding:10px;border-radius:5px;outline:none;user-select:none">Click Here to Open/Close World events</div> | ||
| + | |||
| + | {| class="wikitable sortable mw-collapsible" | ||
| + | |+ <span valign="top" style="white-space:nowrap" width="100">World events list</span> | ||
|- | |- | ||
| − | + | ! Event Name !! Type !! Location !! Notes | |
|- | |- | ||
| − | + | | [[#Attack_begun|Attack begun]] || Notification || Generated Map || | |
|- | |- | ||
| − | + | | [[#Bandit_camp_opportunity|Bandit camp opportunity]] || Quest || Anywhere || | |
|- | |- | ||
| − | + | | [[#Caravan_ambushed_.2F_.28manhunters.29| Caravan ambushed / (manhunters)]] || Battle || Generated Map || Prevents reforming caravan while active | |
|- | |- | ||
| − | + | | [[#Caravan_battle_won|Caravan battle won]] || Notification || Anywhere || Allows reforming the caravan on the world map | |
|- | |- | ||
| − | + | | [[#Caravan_arrived_at_.28Location.29| Caravan arrived at (Location)]] || Notification || Anywhere || | |
|- | |- | ||
| − | + | | [[#Caravan_lost|Caravan lost]] || Notification || Anywhere || | |
|- | |- | ||
| − | + | | [[#Caravan_meeting_by_.28Caravan_ID.29|Caravan meeting by (Caravan ID)]] || Pop-up window || World || | |
|- | |- | ||
| − | + | | [[#Caravan_ready|Caravan ready]] || Notification || Anywhere || | |
|- | |- | ||
| − | + | | [[#Demand|Demand]] || Hostile || World || | |
|- | |- | ||
| − | + | | [[#Peace_talks|Peace talks]]|| Quest || World || Expires on 15 days | |
|- | |- | ||
| − | + | | [[#Rescuee_joins|Rescuee joins]]|| Notification || Anywhere || | |
|- | |- | ||
| − | + | | [[#Ambush|Ambush]] || Sub-event || Generated Map || | |
|- | |- | ||
| − | | | + | | [[#Ambush|Sleeping mechanoids]] || Sub-event || Generated Map || |
| + | |} | ||
| + | </div> | ||
| + | === Anomaly events === | ||
| + | {{Anomaly}} | ||
| + | :{{For|the complete list of events|Events/Anomaly}} | ||
| + | |||
| + | Events from the [[Anomaly]]{{AnomalyIcon}} DLC work different from normal events and are intrinsically related to the [[Monolith]] structure. Due to this, all Anomaly events will be listed on its own page. | ||
| + | |||
| + | == Major threats == | ||
| + | Major threats can appear from Base Builder difficulty onwards. They mostly consist of direct attacks to your colony. Their size depends on the [[raid points]] mechanic; generally increasing in strength with wealth, colonist count, and [[difficulty]]. | ||
| + | |||
| + | [[Cassandra Classic]] and [[Phoebe Chillax]] both treat major threats separately from other events; they cycle between "OnDays" and "OffDays", where a certain amount of major events ''will'' occur during each OnDay cycle. [[Randy Random]] simply treats a major threat as an event that's less likely to happen. | ||
| + | |||
| + | <div class="mw-customtoggle-Majorthreats" style="display:center;background:rgba(128,128,128,0.5);color:white;padding:10px;border-radius:5px;outline:none;user-select:none"> | ||
| + | {{Center|Show/Hide Major Events}}</div> | ||
| + | |||
| + | <div class="mw-collapsible" id="mw-customcollapsible-Majorthreats"><!-- mw-collapsed --> | ||
| + | |||
| + | === Major threats generation=== | ||
| + | Major threats can be fired via 3 different methods: storyteller, quest, and special fired. Storyteller major threats are fired according to the Storyteller's schedule. Randy's "schedule" is a random firing mechanic. Quest major threats must be explicitly accepted by the player. Special fired major threats are limited to Wastepack Infestations that can spawn when a wastepack deteriorates ([[Biotech|Biotech DLC]]{{BiotechIcon}}). | ||
| + | |||
| + | For Storyteller fired major threats, first the storyteller determines which type of major threat is to be sent. Each type of major threat has a specific weight. Some major threats may not be possible at a specific time and would have a weight of 0. For example, Infestations and Mass Animal Insanity each require specific conditions that may not be met. Some major threats are gated behind Raid Point amounts. Infestations and Mechanoid Droner, Defoliator and Clusters all required at least 400 Raid Points. | ||
| + | |||
| + | {| class="wikitable" | ||
| + | |+ Raid Weights | ||
|- | |- | ||
| − | + | ! Raid type !! Vanilla !! DLC enabled | |
|- | |- | ||
| − | | | + | | Raid || 7.40 || 7.40 |
|- | |- | ||
| − | | | + | | DefoliatorShip || 2.00 || 0.40 |
|- | |- | ||
| − | | | + | | DronerShip || 2.00 || 0.40 |
|- | |- | ||
| − | | | + | | MechCluster {{RoyaltyIcon}}|| 0.00 || 1.90 |
|- | |- | ||
| − | | | + | | Manhunter || 2.00 || 2.00 |
|- | |- | ||
| − | | | + | | MassInsanity || 1.30 || 1.30 |
|- | |- | ||
| − | | | + | | Infest || 2.70 || 2.70 |
|- | |- | ||
| − | | | + | | Wastepack Infest {{BiotechIcon}} || 0.00 || 0.024 |
|- | |- | ||
| − | | | + | | Problem Causer {{RoyaltyIcon}} || 0.00 || 0.95 |
| + | |} | ||
| + | |||
| + | === Raid Generation === | ||
| + | After the storyteller has chosen to fire a major threat, and chosen to fire a raid, first the Faction of the Raid is chosen. Each faction is given a weight and all hostile factions are considered separately. Human factions each have a weight of 1. The mechanoid faction's weight changes with raid Points. As Raid Points go up the weight of the Mechanoid Faction Increases. Mechanoids weight is 0 until 300 raid points. The weight of human factions can become 0 at extreme temperatures. | ||
| + | |||
| + | After the faction is chosen, the attack type is chosen. Each attack type has a weight. Some factions do not have all possible attack types. For example, Tribals cannot Siege. After the attack type is chosen, arrival method is chosen. Each arrival method has a weight. Some weights change based on raid points. Some arrival methods are not possible with some factions. Some attack types only arrive via certain methods. | ||
| + | |||
| + | Once Rimworld has determined the faction, attack type and arrival type, a Raid Composition is selected. Each faction has defined raid compositions like the "all sniper" or "all melee attack". | ||
| + | |||
| + | === Enemy attack === | ||
| + | ---- | ||
| + | {{Main|Raids}} | ||
| + | Commonly known as a '''raid''', this event comes in several types. It is possible for multiple raids to happen at the same time, even of opposing factions. [[Raider]]s will come and assault your colony, first attacking adult colonists that they can walk to, then animals and buildings. Human raiders flee if enough of them have been [[downed]] or killed, or if enough damage to your colony has been done. [[Mechanoid]]s will persist indefinitely. | ||
| + | |||
| + | ===== Arrival methods ===== | ||
| + | Tribal-level factions can't use drop pods, so are limited to assaults. | ||
| + | |||
| + | * '''Assaults''': Arrive at the edge of the map, either by walking or by [[drop pod]]. They may assault the colony immediately, or stage for a time before launching their attack, giving you time to prepare. | ||
| + | * '''Center drop''': Raiders immediately attack via drop pod, centered on one of your colonists. There is 40% to drop on an un[[roof]]ed [[orbital trade beacon]] if one is present. Drop pods can go through constructed and thin rock roofs, but not overhead mountain. | ||
| + | * '''Scatter drop''': Raiders immediately attack via drop pod, which have gone "haywire" and will disperse throughout the map. | ||
| + | |||
| + | ===== Types ===== | ||
| + | * '''Smart''': "Unusually clever" raiders will seek to enter your base while avoiding [[trap]]s and [[turret]]s. | ||
| + | * '''Sappers''': Sappers will mine or destroy walls to create the shortest route to a colonist's bedroom. Groups of sappers are smaller in number than the other raid types. | ||
| + | * '''Breachers''': Appear with breach-type raiders, such as tribals with [[breach axe]]s or [[termite]] [[mechanoid]]s. Breachers will attack walls in their path indiscriminately, as opposed to sappers having a target. | ||
| + | * '''Siege''': See below. | ||
| + | |||
| + | <gallery widths="250px" heights="250px" class="left" mode="nolines"> | ||
| + | File:Raid.png|'''Assault''' | ||
| + | File:Raid relationship daughters of a .png|'''Raided by (relationship) mom!''' | ||
| + | File:Drop pods raid.png|'''Drop pod sappers''' | ||
| + | File:Sappers.png|'''Sappers''' | ||
| + | </gallery> | ||
| + | |||
| + | ==== Siege ==== | ||
| + | Sieges are a special type of raid. They arrive in drop pods, along with supplies. They will construct [[sandbag]]s and [[mortar]]s, and will continuously be supplied with food and mortar shells. They will fire at colonists, colony structures, and other pawns they are hostile to. Sieges will directly assault the colony after a long time (a few days), if their mortars are destroyed or unbuildable, or after sufficient casualties. | ||
| + | |||
| + | It is possible to steal a critical material (like [[component]]s) and prevent them from completing construction. This is largely possible with a [[psycast]]er{{RoyaltyIcon}} using both Invisibility and Skip, with enough heat capacity to cast both 2-3 times in a row. | ||
| + | |||
| + | Strategies to force sieges to attack include the [[sniper rifle]] (watch out for other snipers), a [[psychic animal pulser]], or your own [[mortar]]s. | ||
| + | |||
| + | === Infestation === | ||
| + | ---- | ||
| + | {{main|Infestation}} | ||
| + | Infestations come with [[hive]]s and [[insectoid]]s. Hives will produce [[insect jelly]], but will rapidly create insects, too. If you don't want it to infest the whole area, muster your forces and destroy it. But beware - the bugs will defend their hive. | ||
| + | |||
| + | In order for a regular infestation to spawn, there must be an open area with the [[overhead mountain]] roof, within 30 tiles of a colony [[structure]], and a temperature above {{Temperature|-17}}. Light, and temperatures below {{Temperature|-8}} reduce the chance of infestations. | ||
| + | |||
| + | The [[#Too Deep: Infestation|Too Deep: Infestation]] is a separate event. [[Insect]]s can still arrive, but this event has separate mechanics. | ||
| + | |||
| + | The [[#Wastepack_infestation|Wastepack infestations]] is a separate event available if [[Biotech]]{{BiotechIcon}} is active. The end effect is similar, but the mechanics are different. | ||
| + | |||
| + | |||
| + | === Manhunter pack === | ||
| + | ---- | ||
| + | {{For|the mental state that makes these animals hostile|Manhunter}} | ||
| + | A pack of [[scaria]]-infested animals have arrived, [[Manhunter|hunting]] for human flesh. A manhunter pack has 40% more points (i.e. 40% more "raiders") than a regular raid. When killed, scaria has a chance to instantly rot a [[corpse]], which makes them inedible and creates [[rot stink]]. A single animal can arrive and the event will still be called a "pack". | ||
| + | |||
| + | Manhunters will roam the region, attacking any human they can path to. The animals can't enter doors, but if they see a colonist run behind a door, they will attempt to beat down the door. If left alive, they will congregate around your base for anywhere from 24 to 54 in-game hours before they all leave. | ||
| + | |||
| + | [[File:Manhunter pack.png|300px|Manhunting [[warg]]s]] | ||
| + | |||
| + | === Psychic wave === | ||
| + | ---- | ||
| + | Appears as Mad Animals: (Animal name). Immediately drives local [[animals|wildlife]] insane, becoming [[manhunter]]. As opposed to a manhunter pack, these animals do not have [[scaria]], and so won't immediately rot. No new animals are created - only animals already on the map can be affected. This fact means that psychic waves scale poorly with raid points; advanced colonies will find these events much smaller than any other major threat. | ||
| + | |||
| + | As manhunters, the selected animals will roam the region, attacking any human they can path to. The animals can't enter doors, but if they see a colonist run behind a door, they will attempt to beat down the door. Unlike with scaria, the manhunter status will end when the animals need to sleep. | ||
| + | |||
| + | This event has a [[#Mad animal|variation]] that only affects a single animal, which is not considered a major threat. | ||
| + | |||
| + | === Crashed ship part === | ||
| + | ---- | ||
| + | {{For|the help guide|Defense structures#Crashed ships}} | ||
| + | {{For|information on the ship parts themselves|Crashed ship parts}} | ||
| + | A [[crashed ship parts|large piece of an ancient ship]] crashes nearby, along with a pack of [[mechanoid]]s. The mechs will generate dormant, but will awaken when they or the ship part are attacked. While the ship part is still active, they will activate an intensifying negative effect on the map. | ||
| + | |||
| + | ==== Defoliator ship ==== | ||
| + | A crashed defoliator ship kills all wild or domesticated plants in an expanding circle, up to a radius of 100 tiles. The poison kills crops randomly, including plants grown in [[hydroponics basin]]s. Crops will end up nearly impossible to grow. If the [[Biotech DLC]] is active, this ship part will also generate [[Pollution]]{{BiotechIcon}} from its center at a rate of 6~7 tiles per day. | ||
| + | |||
| + | ==== Psychic ship ==== | ||
| + | A ship part projects a psychic drone which negatively affects the [[mood]] of a specific gender. It begins low and grows progressively stronger the longer it stays. [[Psychic sensitivity]] increases or decreases the drone's effect. | ||
| + | |||
| + | The ship's is also capable of emitting psychic pulses that can drive a colonist to an immediate mental break, or nearby animals to madness. | ||
| + | |||
| + | ====== Drone intensifies ====== | ||
| + | If left alone long enough, the drone emitted from a crashed psychic ship will get worse as time goes on. Every 2.5 days the drone gets stronger, from -12 mood at the beginning up to -48 after 7.5 days. | ||
| + | <gallery widths="250px" heights="250px" class="left" mode="nolines"> | ||
| + | File:Poison ship.png|'''Defoliator ship''' | ||
| + | File:Psychic ship.png|'''Psychic ship''' | ||
| + | </gallery> | ||
| + | |||
| + | === Mech cluster === | ||
| + | ---- | ||
| + | {{Royalty|Section=1}} | ||
| + | {{main|Mech cluster}} | ||
| + | Mech clusters are similar to crashed ship parts with a more complex structure, with buildings like [[wall]]s, [[turret]]s, and [[unstable power cell]]s. They also spawn dormant, but can come with activators, able to wake up from proximity or over time. They can come with on-map [[condition causer]]s, such as sun blockers or EMP dynamos. | ||
| + | |||
| + | === Problem causer === | ||
| + | ---- | ||
| + | {{Royalty|Section=1}} | ||
| + | {{main|Condition causer}} | ||
| + | A [[condition causer]] has appeared within 10 world tiles of your colony, creating a negative effect. It must be destroyed to stop the effect. Some conditions may be situationally good, such as a psychic suppressor (male) when you only have females in the colony. | ||
| + | |||
| + | </div> | ||
| + | |||
| + | |||
| + | == Extreme weather == | ||
| + | These events alter the environmental conditions of the colony map, only able to appear from Base Builder difficulty onward. | ||
| + | <div class="mw-customtoggle-XWeather" style="display:center;background:rgba(128,128,128,0.5);color:white;padding:10px;border-radius:5px;outline:none;user-select:none">{{Center|Show/Hide Extreme Weather Events}}</div> | ||
| + | |||
| + | <div id="mw-customcollapsible-XWeather" class="mw-collapsible"><!-- mw-collapsed --> | ||
| + | |||
| + | === Flashstorm === | ||
| + | ---- | ||
| + | [[File:FlashstormScreenshot.png|300px|thumb|left]] | ||
| + | "''A freak localized storm is blasting a small area with repeated lightning strikes.''" | ||
| + | |||
| + | '''Flashstorm''' is a localized, intense '''[[lightning]] storm''' within a radius between 45 and 60 tiles. Active lightning will strike between every {{Ticks|320}} to {{Ticks|800}}. Once it finishes, no rain can fall until {{Ticks|30000}} has passed. This can create big [[fire]]s. It lasts between 0.075 and 0.1 days, and will not reoccur for 15 days. Clicking the envelope icon offers the option to jump to the center point. | ||
| + | |||
| + | This can also be caused by the [[Psycasts#Flashstorm|Flashstorm]] Psycast {{RoyaltyIcon}}, but will not show up as a notification. | ||
| + | {{clear}} | ||
| + | |||
| + | === Toxic fallout === | ||
| + | ---- | ||
| + | "''A distant chemical fire has released a plume of poison over this entire region that will slowly settle out of the atmosphere. It will last for anywhere from a few days to an entire season.''" | ||
| + | |||
| + | '''Toxic fallout''' is a dangerous event which causes [[toxic buildup]] to any pawn not under a roof. The fallout also gives a {{--|5}} [[mood]]let for colonists when outside. It lasts between 2.5 and 10.5 days, will not occur before Day 60 of the colony, and will not reoccur for 90 days. | ||
| + | |||
| + | Toxic buildup from toxic fallout is proportional to both [[Toxic Resistance]] and the [[Toxic Environment Resistance]] of the pawn. Animals have 50% [[Toxic Resistance]], so buildup increases at half the rate, but exposed animals will eventually die. When animals die with toxic buildup, there is a chance, scaling with severity, for their [[corpse]] to immediately rot. | ||
| + | |||
| + | By default, toxic buildup increases at a rate of 40% per day. For humans, a moderate buildup - 40% severity, or 24 hours left outside - is enough to potentially cause permanent damage, from either [[dementia]] or [[carcinoma]]. Death happens at 100% severity. In [[Biotech]],{{BiotechIcon}} both resistances can be gained in a number of ways, allowing counters to the effects of the fallout. These include the [[face mask]], [[gas mask]], [[detoxifier kidney]], [[detoxifier lung]] and several [[genes]]. | ||
| + | |||
| + | Excluding some special cases ([[Anima tree]]{{RoyaltyIcon}}, [[Anima grass]]{{RoyaltyIcon}}, [[Gauranlen tree]]{{IdeologyIcon}}, [[Gauranlen pod]]{{IdeologyIcon}}, [[Polux tree]]{{BiotechIcon}}), all plants will wither during the fallout, trees included. Every in-game hour, the affected plants will receive between 48.9 and 66.1 points of damage {{Check Tag|57.51667 base damage ±15%}}. Crops can be protected under a roof, but without a [[sun lamp]], they'll rot anyways. [[Insectoid]]s and [[mechanoid]]s are fully immune. | ||
| + | |||
| + | <gallery widths="300px" heights="300px" class="center" mode="nolines"> | ||
| + | File:Toxic fallout.png|'''Toxic fallout''' | ||
| + | File:Toxic Buildup at extreme 80 percent.png|'''Colonist acquired Dementia at 80% extreme level''' | ||
| + | </gallery> | ||
| + | |||
| + | === Volcanic winter === | ||
| + | ---- | ||
| + | "''A distant supervolcano has erupted and begun spewing millions of cubic kilometers of ash into the atmosphere. Ash in the atmosphere will obscure the sun. Temperatures will drop and plants will suffer for lack of sunlight. It could pass in a few weeks, or it might last many months.''" | ||
| + | |||
| + | '''Volcanic winter''' lowers the temperature and natural [[light]], which in turn weakens [[solar generator]]s and slows plant growth. They also appear to significantly reduce the inflow of wildlife (observed in a Temperate Forest, 300x300, very few animals came in during Spring-Summer when there would normally be many). This can easily lead to meat shortage and famine if you do not have sufficiently large farms for your colony. Volcanic winters will last between 7.5 and 40 days, will not occur before Day 60 of the colony, and will not reoccur for 140 days. | ||
| + | |||
| + | To be specific, the temperature is reduced by {{Temperature|7}} and the light by 30% over the course of {{Ticks|50000}}. The wildlife density is cut by half, and pawns can no longer enjoy their time outside. | ||
| + | |||
| + | </div> | ||
| + | |||
| + | |||
| + | == Random Events == | ||
| + | These are the 3rd set of events able to be triggered by the [[storyteller]]. Internally, Random Events are classified as either good, bad, or quest. | ||
| + | |||
| + | === Quests === | ||
| + | {{Main|Quests}} | ||
| + | Quests are a class of event that provide conditions to be met or actions to be performed to gain a reward. There are a wide variety of quests, which are listed on the quest page. | ||
| + | |||
| + | === Good === | ||
| + | <div class="mw-customtoggle-RandomGood" style="display:inline-block;background:rgba(128,128,128,0.5);color:white;padding:10px;border-radius:5px;outline:none;user-select:none">Show Good Random Events</div> | ||
| + | |||
| + | <div id="mw-customcollapsible-RandomGood" class="mw-collapsible"><!-- mw-collapsed --> | ||
| + | |||
| + | ==== Ambrosia sprout ==== | ||
| + | [[File:Ambrosia sprout.png|300px|right|thumb|An ambrosia sprout among the trees]] | ||
| + | [[{{Q|Ambrosia bush|Image}}|48px|left|frameless]]{{quote|A grove of the mysterious [[ambrosia bush]] has sprouted nearby! If you wait for the plants to grow, you'll be able to harvest the delicious, pleasurable, and slightly addictive [[Ambrosia|fruit]].}} | ||
| + | Ambrosia bushes are the only way to harvest [[ambrosia]], a safe [[mood]] boosting [[social drug]]. A good way to harvest them is to draw a growing zone over them, but forbid sowing. Colonists will then automatically harvest the bushes when they are fully grown. | ||
| + | |||
| + | It can only happen in the following [[biomes]]: | ||
| + | <div style="width:500px"><ul class="ul-column-width-150"> | ||
| + | * [[Tropical rainforest]] | ||
| + | * [[Tropical swamp]] | ||
| + | * [[Temperate forest]] | ||
| + | * [[Temperate swamp]] | ||
| + | * [[Boreal forest]] | ||
| + | * [[Arid shrubland]] | ||
| + | </ul></div> | ||
| + | |||
| + | ==== Animals join ==== | ||
| + | Tamed dogs or [[farm animals]] from off-map join your colony. | ||
| + | |||
| + | ==== Animal self-tamed ==== | ||
| + | [[File:Thrumbo self-tamed.png|300px|right]] | ||
| + | A random animal on the map becomes tame, and immediately joins the colony. The frequency of self-taming events is unrelated to the number of animals on the map, provided there is at least one. This means in a tundra biome with one snowhare you're just as likely to get a self-taming event as in a tropical swamp populated with dozens of animals. Previously tamed animals can self-tame, and will retain the name and all training they previously had. | ||
| + | |||
| + | For pen animals, you must rope them into a pen or to a caravan hitching spot or the animal will eventually run off the map, though usually this is not urgent. For zoneable animals, you should check the "Animals" tab and assign the animal to an appropriate zone, unless you want to let it move unrestricted. If you are dangerously low on food, be aware that if a zoneable animal self-tames and there is no food in the environment, it will run inside your base and eat your food stores when it gets hungry. | ||
| + | |||
| + | ==== Aurora ==== | ||
| + | An aurora lights up the night sky, giving a +14 mood boost to anyone who is outside watching. While in real life it only happens near the poles, on the rimworlds it can happen anywhere regardless of latitude. It ends at day and otherwise lasts from 0.125 to 0.35 days. | ||
| + | |||
| + | Despite the event text stating that it will "make the night brighter", it does not actually affect the light level. | ||
| + | |||
| + | ==== Cargo pods ==== | ||
| + | [[File:Cargo pods.png|300px|right]] | ||
| + | From time to time, [[transport pod|cargo pods]] will fall out of orbit, containing a random amount of single type of resource. The remains of the pods become [[steel slag chunk]]s, which can be refined into usable metal at an [[electric smelter]]. The pods have a chance of crashing through the roofs of any buildings, damaging any nearby furniture, structures or any pawn they land on. | ||
| + | {{Clear}} | ||
| + | |||
| + | ==== Herd migration: (Animal) ==== | ||
| + | [[File:Thrumbo herd migration.png|300px|right]] | ||
| + | |||
| + | A large herd of [[animal]]s is passing through the area. They won't attack unless provoked. They pass by quickly, so you must be quick if you want to hunt or attempt taming them. | ||
| + | |||
| + | This event only occurs in the following biomes: | ||
| + | |||
| + | <div style="column-count:3; width:350px;"> | ||
| + | * [[Sea ice]] | ||
| + | * [[Ice sheet]] | ||
| + | * [[Tundra]] | ||
| + | * [[Desert]] | ||
| + | * [[Extreme desert]] | ||
| + | |||
| + | </div> | ||
| + | |||
| + | ==== Party ==== | ||
| + | One of your colonists will throw a party around a [[party spot]], or if unavailable, a gather spot ([[table]] or [[campfire]]). Colonists will continually get mood buffs the longer they attend a party.{{Check Tag|Detail|Stacking behavior for party duration?}} Each stack adds {{+|0.8}} to mood, lasts 10 days and stacks up to 10 times, for a max buff of +8 mood. In addition, a party provides many social opportunities. They will usually have [[beer]]s and [[smokeleaf joint]]s, if available, and eat [[meal]]s even when not hungry. | ||
| + | |||
| + | Pawns that don't attend won't get mood buffs. Players may have to [[draft]] and undraft pawns to get them out of work. If too many pawns, or the hosting pawn are drafted at once, or if a [[raid]] happens, then the party will be called off. | ||
| + | |||
| + | ==== Psychic soothe ==== | ||
| + | [[File:Psychic soothe.png|300px|right]] | ||
| + | |||
| + | When this event triggers, the soothe gives a positive mood modifier (+16 for normal colonists, more or less depending on the [[Psychic Sensitivity]]) to all colonists of a randomly chosen sex. It can be considered the opposite of the [[#Psychic drone|Psychic Drone]], but does not have different levels of severity. It lasts between 1.5 and 3.0 days and will not reoccur for 15 days. | ||
| + | {{Clear}} | ||
| + | |||
| + | ==== (Trader type) ==== | ||
| + | This event, without a faction mentioned, occurs when an orbital [[trade]] ship passes near the colony and you have a powered [[comms console]]. Players may trade to obtain resources or weapons, or alternatively sell excess items for silver, which is always accepted by traders. Note that orbital trade ships can appear even when the comms console is turned off, so check the console during a solar flare. | ||
| + | |||
| + | You need to build [[orbital trade beacon]]s before contacting them so you can beam [[silver]] and items up to the ship to actually carry out transactions. You can still check the items for sale even without them however. | ||
| + | |||
| + | ==== (Trader type) from (Faction) ==== | ||
| + | This event with the faction name mentioned means the traders are terrestrial. Trader caravans from other non-hostile factions can stop by your colony, whether specifically requested via the [[comms console]] at a hit to good will or randomly on their own with no penalty. | ||
| + | |||
| + | ==== Transport pod crash ==== | ||
| + | [[File:Rescuee joined your group.png|300px|thumb|right|Since you rescued him/her. Character joined your group!]] | ||
| + | A [[downed]] and injured occupant falls from the sky, containing members of a [[faction]] or neutral, unaffiliated spacers. A friendly or neutral occupant can be rescued to a medical bed, while a hostile member must be put into a prison bed. | ||
| + | The pawn can also be a [[xenotype]]{{BiotechIcon}} that doesn't have any factions on the planet.{{Check Tag|Detail needed|Which xenotypes specifically can be used? All the default types? Wb Sanguo? Wb preferred xenotypes? Wb custom ones from made during game genration? Wb custom ones made after?}} | ||
| + | |||
| + | Once healed, non-hostile crash victims will either join your colony out of gratitude, or walk away to return to their faction. You can instead [[Prisoner|capture]] a non-hostile person, but their faction (if not spacer) will turn hostile. | ||
| + | |||
| + | ===== Paralytic abasia ===== | ||
| + | {{Royalty|section=1}} | ||
| + | A transport pod can crash with a person with [[paralytic abasia]], a [[disease]] which prevents movement until cured (usually after 40 days). Unlike regular transport pods, the person will directly ask to join the colony. If you refuse, then colonists will get the same penalties as if you banished another colonist. | ||
| + | |||
| + | ===== Baby ===== | ||
| + | {{Biotech|section=1}} | ||
| + | A transport pod may crash with a [[baby]] instead of the regular occupant, and will always appear as a friendly faction/neutral refugee/unaffiliated. You can choose to ignore it and let it starve to death, or adopt the baby by selecting it and click "Adopt". Rarely, the corpse of the baby's parent can also appear next to it, still in pristine condition. | ||
| + | {{clear}} | ||
| + | |||
| + | ==== Wanderer joins ==== | ||
| + | A random person will forcefully try and join the colony. You have 24 hours to accept or reject them. Accepting will have them appear on the world map. Rejecting will give the same penalties as if you had banished a colonist. Unless it'd be dangerous to enter your colony, there is no reason not to accept the wanderer, see their stats, and then decide to keep or banish them. | ||
| + | |||
| + | With [[Ideology]]{{IdeologyIcon}}, the colonist that joins the colony will have a randomized Ideoligion. This event can also occur at 50% rate if an [[Ideoligion]]'s event result set for this event is "Beautiful/Fun/Good / Unforgettable", with said colonist with the same Ideoligion as the masses of the colonist in the colony. | ||
| + | |||
| + | <gallery widths="300px" heights="300px" class="center" mode="nolines"> | ||
| + | File:Wanderer joins normal.png|'''Common character''' | ||
| + | File:Wanderer joins relationship.png|'''Related character''' | ||
| + | </gallery> | ||
| + | |||
| + | ==== Wild (wo)man wanders in ==== | ||
| + | A random person with no faction wanders into your colony and will mill about the map. You have the option to [[Tame]] this person with a minimum [[Skills#Animals|Animals skill]] of {{Q|Human|Minimum Handling Skill}}. Doing so will convert them to into a completely normal colonist. Sometimes, they may not be able to resist the harshness of nature and may fall unconscious (ex: Toxic Fallout, extreme temperatures), allowing you to rescue them like transport pod crash victims. They also have the same hunger needs as regular humans, and if they do not find animals to hunt or wild plants (or simply do not want to) they can walk into your base and eat your food, which can be an annoyance. Arresting them will not allow you to recruit or [[Slavery|enslave]]{{IdeologyIcon}} them like regular prisoners, they must be tamed or rescued. | ||
| + | |||
| + | Wild humans have a 50% chance of attacking when harmed, and 10% if taming fails. | ||
| + | |||
| + | These wild (wo)men may have random Ideoligion with [[Ideology]]. | ||
| + | |||
| + | Unlike other animals, wild people will not flee from gunfire. Wild people can hunt human pawns for food like a predator, regardless of whether they are cannibals or not. Wild people who are incapable of violence will not hunt at all, but may still become manhunter when provoked. | ||
| + | |||
| + | <gallery widths="250px" heights="250px" class="center" mode="nolines"> | ||
| + | File:Wild man wanders in.png|'''Wild man wanders in''' | ||
| + | File:Wild man rescued instead.png|'''Wild man joins without "taming"''' | ||
| + | </gallery> | ||
| + | |||
| + | ==== Traveler Visit ==== | ||
| + | {{:Traveler}} | ||
| + | |||
| + | ==== Visitor(s) ==== | ||
| + | Friendly faction members may stop by your settlement. Occasionally, they will have a few goods to trade. Like a regular trader they will mill about the player's colony for a while. Unlike a regular trader, they don't have many goods with them, nor do they have as much silver to buy your goods. Visitors possess no higher purpose otherwise, but will fight mutual enemies. | ||
| + | |||
| + | Sometimes there will be a singular visitor. In this case, the game will notify you of the backstory of that visitor. | ||
| + | |||
| + | ==== Royal Tribute Collector ==== | ||
| + | {{Royalty|section=1}} | ||
| + | {{Main|Royal tribute collector}} | ||
| + | If you are not hostile to the [[Empire]], Royal Tribute Collectors will visit the colony approximately twice a year. Tribute collectors are essentially Empire-only trade caravans that exclusively accept [[gold]] and [[prisoner]]s in exchange for [[Titles#Honor|Honor]]. | ||
| + | |||
| + | ==== Gauranlen pod sprout ==== | ||
| + | {{Ideology|section=1}} | ||
| + | {{quote|A Gauranlen pod has sprouted nearby! Harvest it to collect a Gauranlen seed. This special seed can be used to plant the majestic [[Gauranlen tree]]. Your colonist can connect with Guaranlen trees and make them spawn resources and helpful dryads to work or fight for you.}} | ||
| + | |||
| + | A [[Gauranlen pod|pod]] will appear somewhere with the current map. Harvesting it yield 1-2 [[Gauranlen seed]]. This event occurs roughly every 60 [[time|days]] in every [[biome]] except Ice Sheets and Sea Ice, and this time is decreased to roughly every 30 days for [[Ideoligion#Tree connection|tree connectors]]. This event can also occur if an [[Ideoligion]]'s ritual result is set to trigger this event and performing the ritual receives a "Beautiful/Fun/Good/Unforgettable" quality. | ||
| + | |||
| + | ==== Polux tree sprout ==== | ||
| + | {{Biotech|section=1}} | ||
| + | A [[polux tree]] may appear whenever there is enough [[pollution]] around. It will consume and clean up said pollution, but will not do so if it or its roots are under a roof. | ||
| + | |||
| + | </div> | ||
| + | |||
| + | === Bad === | ||
| + | <div class="mw-customtoggle-RandomBad" style="display:inline-block;background:rgba(128,128,128,0.5);color:white;padding:10px;border-radius:5px;outline:none;user-select:none">Show Bad Random Events</div> | ||
| + | <div id="mw-customcollapsible-RandomBad" class="mw-collapsible"><!-- mw-collapsed --> | ||
| + | |||
| + | ==== Beavers! ==== | ||
| + | A group of ravenous tree-munching [[alphabeaver]]s appears at the edge of the map. This only occurs in the [[arid shrubland]] and [[tundra]], and only when the outdoor [[temperature]] is above the alphabeaver's [[minimum comfortable temperature]] of {{Temperature|{{Q|Alphabeaver|Min Comfortable Temperature}} }}. It will not reoccur for 30 days. | ||
| + | |||
| + | Beavers will act like any other animal. But due to their unique diet and extreme hunger, beavers will continually eat [[trees]] and [[Saguaro cactus|Saguaro cacti]] they can reach, including [[anima tree]]s{{RoyaltyIcon}}, [[gauranlen tree]]s{{IdeologyIcon}}, [[polux tree]]s{{BiotechIcon}} and any trees you're farming. Alphabeavers will not and cannot eat the {{Icon Small|wood}} [[wood]] item, [[wood]]en buildings, or any other item made out of wood. | ||
| + | |||
| + | The beavers will continue eating until there are no trees left, unless you eradicate them or they're driven off the map by temperature. | ||
| + | |||
| + | ==== Birthday ==== | ||
| + | Character gains an age-related illness, such as [[bad back]] or [[cataract]]s. They may be cured by using the [[healer mech serum]], [[luciferium]], a [[biosculpter pod]]{{IdeologyIcon}}, or the Scarless [[gene]]{{BiotechIcon}}. Some may be 'cured' by replacing the affected parts with bionics. | ||
| + | |||
| + | Due to age or a pre-existing health condition, they can also have a [[heart attack]]. | ||
| + | {{Clear}} | ||
| + | |||
| + | ==== Blight ==== | ||
| + | {{main|Blight}} | ||
| + | [[File:Crop blight.png|200px|thumb|right|Blighted crops with an indicator above them.]] | ||
| + | |||
| + | Blight is a disease that infects [[domesticated plants]] with a growing period shorter than 15 days. Blighted crops will not grow or yield anything when harvested, and the blight will spread to other nearby plants within 3 tiles. These plants must be cut in order to avoid further spread. [[Tree]]s, [[Wild Plants|wild]], [[Decorative Plants|decorative]] plants, and [[devilstrand mushroom]]s are immune to blight. | ||
| + | |||
| + | Blight starts on one of your crops, at 10% severity, affecting 20% of your plants (40% initial plants affected has been witnessed in December 2020). It will progress slowly once plants are infected, and once it reaches 28% it can spread to nearby plants within a 4-tile radius. | ||
| + | |||
| + | It will not reoccur for 30 days. | ||
| + | |||
| + | ==== Disease ==== | ||
| + | Colonists (including [[prisoner]]s and [[slave]]s{{IdeologyIcon}}) or animals will gain a random [[disease]]. [[Biome]] influences both the amount of disease and its selection. Multiple pawns can get a disease at once, but diseases never spread between pawns. Disease events are controlled separately from other events by your [[storyteller]]. | ||
| + | |||
| + | [[Traits#Sickly|Sickly]] pawns will get sick with a MTB of 30 days, independently of the rest of your colonists. | ||
| + | |||
| + | ==== Eclipse ==== | ||
| + | A moon has moved in front of the sun, causing an eclipse. Without [[light]], [[solar generator]]s won't function, and outdoor crops stop growing. It lasts between 0.75 and 1.25 days. | ||
| + | |||
| + | If reliant on solar power, make sure to have [[battery|batteries]] for times like these, or an eclipse raid can be extra threatening. | ||
| + | |||
| + | Pawns with the [[Ideoligion#Eclipse|Eclipse: Beautiful]] precept{{IdeologyIcon}} will receive a {{+|5}} moodlet for seeing an eclipse. | ||
| + | |||
| + | It will not reoccur for 15 days | ||
| + | |||
| + | ==== Heat wave ==== | ||
| + | {{stub|section=1|reason=Needs details. What's the chance for a fire to occur?}} | ||
| + | A heat wave sweeps the colony, driving outdoor [[temperature]]s unusually high for 1.5 and 3.5 days. To be precise, the temperature will increase by {{Temperature|17}} over 12000 game ticks (4.8 in-game hours). There is also a chance for a [[fire]] to randomly appear on the map, which can quickly spread. It only occurs when the map's summer temperature is at least {{Temperature|20}}, and will not reoccur for 30 days. | ||
| + | |||
| + | The major risks are [[cooler]]s failing to freeze food, and [[heat stroke]] to your colonists and animals. Summer clothing like [[cowboy hat]]s and [[tribalwear]] can mitigate the heat, and [[passive cooler]]s can help make indoor temperatures bearable. | ||
| + | |||
| + | Do note that an while this event remains active, the colony will not trigger the events Cold Snaps, Volcanic Winter, nor additional Heat Waves. The one exception are events triggered by quest, which will apply regardless. | ||
| + | |||
| + | ==== Cold snap ==== | ||
| + | A cold snap strikes the colony, driving outdoor [[temperature]] unusually low for 1.5 and 3.5 days. To be precise, the temperature decreases by {{Temperature|20}} over 12000 game ticks (4.8 in-game hours). It only occurs when the map's summer temperature is in the range of {{Temperature|0|15}}, and will not reoccur for 30 days. Colonists will complain about the cold, especially sleeping in it if their rooms are not properly heated. | ||
| + | |||
| + | While this is generally good for item preservation, it can kill off crops, influence colonist moods and cause [[Ailments#Hypothermia|hypothermia]] if colonists or animals stay in non-heated areas for a prolonged time. It also renders most of the plants in the area inedible (unless when it happens in warmer areas in which some plants are still edible), potentially causing tame animals to starve to death and wild ones to leave the map. With no other food source, wild predators may attack colonists and tame animals while they are outdoors. Snowing may also happen, depositing thick snow that can slow down outdoor movement significantly. | ||
| + | |||
| + | [[Jacket]]s, [[duster]]s, [[parka]]s and [[tuque]]s provide cold insulation for colonists, protecting them while they're awake, though they don't prevent mood loss caused by sleeping in cold areas. | ||
| + | |||
| + | Do note that an while this event remains active, the colony will not trigger the events Heat Waves, Volcanic Winter, nor additional Cold Snaps. The one exception are events triggered by quest, which will apply regardless. | ||
| + | |||
| + | |||
| + | ==== Mad animal ==== | ||
| + | A single random animal on the map turns [[manhunter]], like a psychic wave. The insane animal will charge toward the nearest human anywhere on the map, attacking any other animal or obstacle (doors, fences, barricades, etc.) blocking its way. If the "nearest" colonist changes, the animal may change its focus to that target. | ||
| + | |||
| + | Any animal can be dangerous to a colonist, but multiple colonists can usually take them out. Large animals, as well as the explosive [[boomalope]] and [[boomrat]], are bigger threats. | ||
| + | |||
| + | ==== Psychic drone ==== | ||
| + | {{For|the moodlet|Mood#Exotic}} | ||
| + | 'Drone' in this case does not refer to "Unmanned Aerial Vehicle" but instead "To produce a low-pitched hum or buzz." A psychic drone affects all colonists of a randomly chosen gender, giving a [[Mood#Exotic|strong negative moodlet]]. The drone can vary in severity, from low (-12 mood) to extreme (-40 mood). [[Psychic Sensitivity]] will multiply the effect on the drone. It lasts between 0.75 and 1.75 days and will not reoccur for 15 days. | ||
| + | |||
| + | Colonists have no choice but to endure it, as the point of origin is off-map. [[Psychic foil helmet]]s, [[drug]]s, and other mood-enhancers can help deal with the effects. Animals are not affected. | ||
| + | |||
| + | ==== Solar flare ==== | ||
| + | Solar flares cause all electrical devices to stop working for its duration, from 0.15 to 0.5 days. [[Wood-fired generator]]s and [[chemfuel generator]]s will still burn fuel during this time. | ||
| + | |||
| + | * Colonies that rely on turrets for defense will become vulnerable to raids. | ||
| + | * Heaters and coolers will stop working. In extreme temperatures, crops will die and colonists can be at risk of heatstroke or hypothermia. [[Campfire]]s and [[passive cooler]]s are low-tech options that work even in a solar flare. | ||
| + | * Crops in a [[hydroponics basin]] will rapidly degrade, regardless of the temperature. It's recommended to quickly harvest any crops that can't be saved before they die. | ||
| + | * Occasionally an [[Trade#Orbital|orbital trade ship]] may arrive during the event, so it is wise to check out the Comms Console as soon as the event ends or risk getting the ''''<trader> has left comms range"'' notification while unaware of their presence. If a ship leaves ''during'' a solar flare, you ''will'' be notified that the trader has left, although this is only a minor message in the upper right of the screen. | ||
| + | * The colony is immune to the effects of a solar flare while also undergoing [[unnatural darkness]]{{AnomalyIcon}} | ||
| + | |||
| + | Due to its length, most of the adverse effects are manageable. | ||
| + | |||
| + | ==== Zzztt ==== | ||
| + | This event can occur anytime a [[power conduit]] has energy flowing through it. The conduit may suffer a fault, causing a short circuit. They may also occur if certain objects are left unroofed and are exposed to [[weather|rain or snow]]. Short-circuits not caused by rain/snow will not reoccur for 8 days. Short circuits do not affect [[Hidden_conduit|hidden conduits]], meaning zzztts can be avoided entirely by simply having all applicable buildings under roofs and having a network made entirely of hidden conduits. | ||
| + | |||
| + | The following buildings short circuit due to weather: | ||
| + | <div style="column-count:3; width:700px;"> | ||
| + | * [[Sun lamp]] | ||
| + | * [[Tube television]] | ||
| + | * [[Flatscreen television]] | ||
| + | * [[Megascreen television]] | ||
| + | * [[Comms console]] | ||
| + | * [[Multi-analyzer]] | ||
| + | * [[Vitals monitor]] | ||
| + | * [[Battery]] | ||
| + | * [[Electric tailor bench]] | ||
| + | * [[Electric smithy]] | ||
| + | * [[Machining table]] | ||
| + | * [[Electric stove]] | ||
| + | * [[Electric smelter]] | ||
| + | * [[Biofuel refinery]] | ||
| + | * [[Fabrication bench]] | ||
| + | * [[Hi-tech research bench]] | ||
| + | * [[Electric crematorium]] | ||
| + | * [[Heater]] | ||
| + | * [[Lightball]]{{IdeologyIcon}} | ||
| + | * [[Loudspeaker]]{{IdeologyIcon}} | ||
| + | * [[Autobong]]{{IdeologyIcon}} | ||
| + | </div> | ||
| + | |||
| + | Short circuits will either result in a [[fire]], or, if any [[battery|batteries]] are connected to the circuit and contains at least 20Wd, a fiery explosion centered on the tile, that increases with energy stored. The explosion deals 10 [[Damage Types#Flame|Flame damage]] and setting objects on fire. If the explosion radius is greater than 3.5 tiles, a second explosion of 30% radius deals 50 [[Damage Types#Bomb|Bomb damage]], which can extinguish fires. The fault will also discharge all stored power in batteries in the process. | ||
| + | |||
| + | The explosion radius is controlled by the following equation: | ||
| + | |||
| + | {| class="wikitable" | ||
| + | | '''Explosion Radius''' = '''clamp'''( '''sqrt'''(Sum of all stored power) * 0.05, 1.5, 14.9) | ||
| + | |} | ||
| + | |||
| + | Or in other words, the radius will be at least 1.5 tiles, and at most 14.9 tiles, with a bomb explosion of 4.5 tiles. This occurs when a total of 90,000 Wd is stored. Bomb explosions can occur beyond once 4,900 Wd are stored. | ||
| + | |||
| + | {| class="wikitable" | ||
| + | ! Explosion radii per number of [[batteries]] filled | ||
|- | |- | ||
| − | | | + | | {{Graph:Chart |
| + | | width = 400 | ||
| + | | height = 150 | ||
| + | | type = rect | ||
| + | | legend = Legend | ||
| + | | colors = gold, firebrick | ||
| + | | yGrid = | ||
| + | | xGrid = | ||
| + | | xAxisTitle = Filled Batteries | ||
| + | | xAxisMin = | ||
| + | | xAxisMax = | ||
| + | | yAxisMin = | ||
| + | | yAxisMax = | ||
| + | | yAxisTitle = Radius (Tiles) | ||
| + | | x = 0, 1, 2, 3, 4, 5, 6, 7, 8, 9, 10 | ||
| + | | y1Title = Flame explosion | ||
| + | | y1 = 1.5, 1.5, {{#expr: sqrt(2*600)*0.05}}, {{#expr: sqrt(3*600)*0.05}}, {{#expr: sqrt(4*600)*0.05}}, {{#expr: sqrt(5*600)*0.05}}, {{#expr: sqrt(6*600)*0.05}}, {{#expr: sqrt(7*600)*0.05}}, {{#expr: sqrt(8*600)*0.05}}, {{#expr: sqrt(9*600)*0.05}}, {{#expr: sqrt(10*600)*0.05}} | ||
| + | | y2Title = Bomb explosion | ||
| + | | y2 = 0,0,0,0,0,0,0,0,0 , {{#expr: sqrt(9*600)*0.05*0.3}}, {{#expr: sqrt(10*600)*0.05*0.3}} | ||
| + | }} | ||
|} | |} | ||
| − | | {{ | + | Unconnected batteries, such as through an open switch or on separate power network, will not be affected. Power networks which contain only [[Battery|batteries]] and no conduits will not experience this event. Power networks which contain only conduits will only have a single tile on fire, as there's no stored power to be discharged. |
| + | |||
| + | ==== Transport pod crash (Ghoul) ==== | ||
| + | {{Anomaly|section=1}} | ||
| + | A transport pod may crash with a [[ghoul]] instead of the regular occupant, and will always appear as unaffiliated. They will always appear as hostile and will initially be in shock, but if left ignored, will immediately attempt to attack anything or anyone nearby after a while. | ||
| + | |||
| + | ==== Gray pall ==== | ||
| + | {{Anomaly|section=1}} | ||
| + | A fog of eerie, gritty dust settles on the map. Colonists standing in an unroofed area will receive a {{bad|-6}} '''gray pall exposure''' moodlet, while colonists under a roof will have {{bad|-3}} '''gray pall'''. The pall is otherwise not dangerous and disappears after 1-2 days. | ||
| + | </div> | ||
| + | |||
| + | |||
| + | == Incidental Events == | ||
| + | :{{For|a detailed list of these events|Events/Incidental}} | ||
| + | These events aren't triggered by the [[storyteller]]. Instead, they come from various other game mechanics. | ||
| + | For purposes of the wiki, these are divided in good, bad, faction, informational, and social events. | ||
| + | |||
| + | == World incidents == | ||
| + | :{{For|a guide to survive these events|World Quests Guide}} | ||
| + | These are events related to/only triggered on the overworld. | ||
| + | <div class="mw-customtoggle-WorldEvents" style="background:rgba(128,128,128,0.5);color:white;padding:10px;border-radius:5px;outline:none;user-select:none">{{Center|Show/Hide World Events}}</div> | ||
| + | |||
| + | <div id="mw-customcollapsible-WorldEvents" class="mw-collapsible"><!-- mw-collapsed --> | ||
| + | |||
| + | ==== Attack begun ==== | ||
| + | This notification will appear when a [[caravan]] has arrived at a settlement chosen for attacking. | ||
| + | |||
| + | ==== Bandit camp opportunity ==== | ||
| + | {{See also|Offense tactics}} | ||
| + | |||
| + | Some ruffians are causing trouble nearby and other factions will pay you to wipe them out. | ||
| + | |||
| + | The bandit camp will time out and are weaker than regular enemy bases. | ||
| + | |||
| + | Destroying them increases goodwill by 8 and returns a payment worth 2000 to 3000 worth of silver, whether it consists of items or silver itself. | ||
| + | |||
| + | ==== Caravan ambushed / (manhunters) ==== | ||
| + | While traveling, one of your [[caravan]]s are attacked. The game will give you a mini map to defend it. | ||
| + | |||
| + | The attackers can be an enemy faction lying in ambush or a rampaging manhunter pack your caravan unfortunately trespasses upon. | ||
| + | |||
| + | ===== Caravan battle won ===== | ||
| + | This event will tell you if your people won their fight, and can reform the caravan on the world map. | ||
| + | |||
| + | ==== Caravan arrived at (Location) ==== | ||
| + | This is a simple notification that your caravan has arrived at their destination. | ||
| + | |||
| + | ==== Caravan lost ==== | ||
| + | [[File:Caravan destroyed.png|thumb|right|400px]] | ||
| + | All human members of your caravan have died, or have been downed on an event map. Anything carried by the caravan, including animals, will be lost to the wild. | ||
| + | |||
| + | If colonists were downed but not killed while fighting human enemies, it is possible for some of them to appear later in a Prisoner Rescue Quest. | ||
| + | {{Clear}} | ||
| + | |||
| + | ==== Caravan meeting by (Caravan ID) ==== | ||
| + | This is a pop up window rather than an event with envelope icon. While away from your bases, your caravans may randomly encounter other traders out in the world who would be happy to trade with you. Of course, you also have the option to attack them. Be careful, trade caravans are usually well defended. | ||
| + | |||
| + | ==== Caravan ready ==== | ||
| + | Once you've designated a [[caravan]], you'll get this notification once all of the colonists, prisoners, animals and items have been assembled and left the map. It is now ready to send to other settlements or form another settlement of your own, if you've enabled multiple settlements in the game's settings. | ||
| + | |||
| + | ==== Demand ==== | ||
| + | A hostile faction approaches your caravan and demand that you give them items and/or hand over members as slaves. If you refuse, they will proceed to assault the caravan. | ||
| + | |||
| + | You can see their number when they are demanding you hand over items. | ||
| + | |||
| + | ==== Peace talks ==== | ||
| + | [[File:Peace talks.png|thumb|right|300px]] | ||
| + | |||
| + | A hostile faction leader decides to drop his weapons and offers to talk things out for once. The offer expires after 15 days if ignored. Pirates will never attempt peace talks. | ||
| + | |||
| + | To participate, you will need to send a [[caravan]] with a capable negotiator. Once the destination is reached, the most capable negotiator in your caravan will proceed to talk with the leader to hopefully improve relations. | ||
| + | |||
| + | There are several outcomes of the incident, each being a sub-event of its own. No matter the outcome, your negotiator will always gain social skill. | ||
| + | |||
| + | {| class="wikitable" | ||
| + | |- | ||
| + | ! Result !! Description !! Base Weight | ||
| + | |- | ||
| + | | '''Peace talk triumph''' || The peace talks were very successful, giving a great boost to relations from 50 to 75. In addition, the faction will give a farewell gift worth between 500 and 1500 silver. <br/>Despite your triumph, if you don't manage to bring relations above 0, they will still remain hostile. || 0.1 | ||
| + | |- | ||
| + | | '''Peace talk success''' || The talks were a success, and relations between the factions have warmed somewhat, from 25 to 75. || 0.55 | ||
| + | |- | ||
| + | | '''Peace talk flounder''' || The talks were neither successful nor a failure, and relations remain unchanged. || 0.2 | ||
| + | |- | ||
| + | | '''Peace talk backfire''' || The peace talks backfired, and relations have gotten worse than they started, from -10 to -50 relations. || 0.1 | ||
| + | |- | ||
| + | | '''Peace talk disaster''' || The peace talks have failed so miserably that the faction hates you a lot more now, with a -25 to -75 damage to relations, as well as instantly turning hostile if they aren't already. In addition, the angered faction sends a group of attackers after your negotiating party. || 0.05 | ||
|} | |} | ||
| + | ===== Outcome chances ===== | ||
| + | The actual outcome chances are dependent on the negotiator's Diplomacy Power stat, after going through a simple curve. To do this, the game calculates the bad outcome factor, of the negotiator first. | ||
| + | |||
| + | * At 0% power, the bad outcome factor is 4. | ||
| + | * At 100% power (healthy, lvl 10 Social), the bad outcome factor is 1. | ||
| + | * At 150% power (healthy, lvl 20 Social), the bad outcome factor is 0.4. | ||
| + | |||
| + | The new weight of each outcome is calculated afterwards. | ||
| + | |||
| + | * Triumph = 0.1 * ( 1 / Bad Outcome Factor) | ||
| + | * Success = 0.55 * ( 1 / Bad Outcome Factor) | ||
| + | * Flounder = 0.2 | ||
| + | * Backfire = 0.1 * Bad Outcome Factor | ||
| + | * Disaster = 0.05 * Bad Outcome Factor | ||
| + | The sum total of the new weights is then calculated. | ||
| + | |||
| + | Finally, the probability of each outcome is calculated: | ||
| + | |||
| + | {{Math|big=0|Probability of each outcome {{=}} New Weight ÷ Sum Total of Weights}} | ||
| + | |||
| + | <div class="mw-customtoggle-PeaceTalkEx" style="display:inline-block;background:rgba(128,128,128,0.5);color:white;padding:10px;border-radius:5px;outline:none;user-select:none">Example</div> | ||
| + | |||
| + | <div class="mw-collapsible mw-collapsed" id="mw-customcollapsible-PeaceTalkEx"> | ||
| + | <div class="mw-collapsible-content" style="background:rgba(255,255,255,.5);margin-top:0px;padding:10px;border-radius:5px"> | ||
| + | Take a level 15 Social negotiator as an example: | ||
| + | |||
| + | # The diplomacy power is 125%, corresponding to a bad outcome factor of 0.7. | ||
| + | # The new weight of each outcome, to 3 d.p.: | ||
| + | #* Triumph = 0.1 * ( 1 / 0.7) = 0.143 | ||
| + | #* Success = 0.55 * ( 1 / 0.7) = 0.786 | ||
| + | #* Flounder = 0.2 | ||
| + | #* Backfire = 0.1 * 0.7 = 0.07 | ||
| + | #* Disaster = 0.05 * 0.7 = 0.035 | ||
| + | # The sum total of new weights is calculated: | ||
| + | #* 0.143 + 0.786 + 0.2 + 0.07 + 0.035 = 1.234 | ||
| + | # Finally, the probability of each event, to 2 d.p.: | ||
| + | #* Triumph = 0.143 / 1.234 = 11.58% | ||
| + | #* Success = 0.786 / 1.234 = 63.69% | ||
| + | #* Flounder = 0.2 / 1.234 = 16.21% | ||
| + | #* Backfire = 0.07 / 1.234 = 5.67% | ||
| + | #* Disaster = 0.035 / 1.234 = 2.84% | ||
| + | </div> | ||
| + | </div> | ||
| + | |||
| + | ==== Rescuee joins ==== | ||
| + | Should you succeed in rescuing a prisoner or you offer help to an incapacitated refugee, he or she will immediately join your faction. | ||
| + | |||
| + | === Sub-events === | ||
| + | These aren't quest events on its own, but may happen during other world events such as Incapacitated Refugee or Item Stash Opportunity. | ||
| + | |||
| + | ==== Ambush ==== | ||
| + | [[File:Incapacitated refugee Ambushed.png|thumb|right|400px]] | ||
| + | Enemies may enter the minimap a little while after your colonists arrive or suddenly appear near the objective when your pawns draw close to it. It's even possible for animals to lie in wait. | ||
| + | {{Clear}} | ||
| + | |||
| + | ==== Sleeping mechanoids ==== | ||
| + | When the map generates, sleeping mechanoids will be present near the objective. Going too close to them will awaken them, making them attack. While they are present, you cannot manually reform the caravan as the game notifies you that there are hostiles in the area, but you can still leave through the edges. | ||
| + | </div> | ||
| + | |||
| + | == Game endings == | ||
| + | When these happen, they signify that your game has ended, one way or another. | ||
| + | <span class="mw-Gameend_toggle" style="font-size:small; display:inline-block; float:right;"> </span> | ||
| + | <div id="mw-Gameend_collapsible" class="mw-collapsible mw-collapsed" data-expandtext="Reveal" data-collapsetext="Hide"> | ||
| + | |||
| + | ==== Game over ==== | ||
| + | [[File:Game over.png|400px|thumb|right|Welp, time to start a new game I guess...]] | ||
| + | This happens when all your colonists are either dead, missing, or left the planet. The game will show a Letter which says that [[Endings#Colony_End|everyone is gone or dead]], and allows you to return to the main menu. You can continue playing, and someone may find a use for the wreckage of your base. | ||
| + | |||
| + | Should you decide to continue playing, events will continue to happen, which can affect the ruined base but not anyone. You can strike lucky and roll 'Wanderer joins' or 'Refugee chased' events, giving you a colonist to rebuild from. | ||
| + | |||
| + | Post 1.4, the game over letter has been updated with the option to generate multiple new colonists as a whole group. This event is referred to in the [[Scenario_system|scenario editor]] as the Wanderer'''s''' <small>(plural)</small> Join incident, although it always occurs, only manually. This works just the same as the beginning colonist selection, including specifying age range and xenotypes and sharing your original ideology. | ||
| + | {{Clear}} | ||
| + | |||
| + | ==== Planetkiller ==== | ||
| + | [[File:Game over planetkiller.png|400px|thumb|right|Ouch.]] | ||
| + | "''An interstellar planetkiller weapon is approaching this planet. It will smash the planet apart like a rifle bullet hitting an egg, annihilating all life.''" | ||
| + | |||
| + | This event can only happen by configuring the starting scenario. | ||
| + | |||
| + | When it happens, the screen will fade to white, and a message will show that the planet is obliterated by a planetkiller and that you did not survive. | ||
| + | |||
| + | Unlike your regular 'Game Over', you cannot continue the game. Saved games (including permadeath) can be continued from their last saves, however. | ||
| + | {{Clear}} | ||
| + | |||
| + | ==== Ending - The Archonexus Core ==== | ||
| + | For specifics, see [[Endings#The_Archonexus]]. | ||
| + | |||
| + | Once it happens, your colony is succesfully noticed by an archotech. What happens next is left to especulation. | ||
| − | <span id ="DiseasesTable"></span> | + | Similar to the Planetkiller and unlike other endings, you cannot continue the game once reaching this ending. Saved games (including permadeath) can be continued from their last saves, however. |
| + | </div> | ||
| + | |||
| + | |||
| + | == Legacy events == | ||
| + | Events from previous versions of RimWorld, now removed. | ||
| + | <span class="mw-Legacy_toggle" style="font-size:small; display:inline-block; float:right;"> </span> | ||
| + | <div id="mw-Legacy_collapsible" class="mw-collapsible mw-collapsed" data-expandtext="Reveal" data-collapsetext="Hide"> | ||
| + | |||
| + | === Bonded animal's death === | ||
| + | [[File:Bonded animals death.png|300px|thumb|right|Bonded animal dies affecting the owner's mood.]] | ||
| + | Both of these bonded death events were simplified into the [[Events/Incidental#Death|Death: (Pawn)]] event. | ||
| + | |||
| + | An animal with a bond to a colonist dies, affecting that colonist's mood negatively. Enemies may directly target your animals during attacks. Enemies, turrets or even your own colonists can even hit them unintentionally during shootouts, especially animals trained for Release and checked to follow your drafted colonists in the Animals tab. Wild predators may hunt and kill your animals, including bonded ones. Bonded animals can also fall into traps. It can even occur intentionally by slaughtering, euthanizing or manually drafting and attacking the bonded animal. | ||
| + | {{Clear}} | ||
| + | |||
| + | === Bonded master's death === | ||
| + | Both of these bonded death events were simplified into the [[Events/Incidental#Death|Death: (Pawn)]] event. | ||
| + | |||
| + | The inverse of a bonded animal's death. This time, it's the master who dies, through causes such as enemy raids, disease or large wild predators getting hungry. | ||
| + | |||
| + | When this happens, any animal that is bonded to the master will have a mental break. It can be a less dangerous one such as a dazed wander, or a more dangerous one such as a berserk rage. | ||
| + | |||
| + | This is one of the only situations where animals can have non-manhunter mental breaks. | ||
| + | |||
| + | === Breakdown: (Machine) === | ||
| + | In previous versions, this was its own event. Now it's just a notification. | ||
| + | |||
| + | One of your machines will break down and will not work until repaired with a [[component]]. If this happens to a [[hydroponics basin]], any crops in it will wither and die unless repaired immediately. | ||
| + | |||
| + | This only applies to machines using electricity. | ||
| + | |||
| + | === Tornado === | ||
| + | A tornado has touched down in this region, and will proceed to wreak havoc on anything in its way. There is small chance it may spawn at the map borders and eventually [[:File:The tornado has left the map.png|leave the map]]. | ||
| + | |||
| + | Tornadoes rapidly deal damage to any structure or item that is right beneath it. Any pawn underneath will rapidly receive scratches from the random objects blowing about in the wind. | ||
| + | |||
| + | Naturally forming tornadoes are exclusive to Beta 18. You can still use the [[Tornado generator]] to spawn them in for defense purposes. | ||
| + | </div> | ||
| + | |||
| + | == Event data == | ||
| + | Note: events that give colonists, such as wanderers or transport pod crashes, are affected by the [[storyteller]]'s population intent factor. They become more common if you have few colonists, and rare if you have many. | ||
| + | |||
| + | <span class="mw-Eventdata_toggle" style="font-size:small; display:inline-block; float:right;"> </span> | ||
| + | <div id="mw-Eventdata_collapsible" class="mw-collapsible mw-collapsed" data-expandtext="Reveal" data-collapsetext="Hide"> | ||
| + | |||
| + | {| {{STDT| sortable c_08 text-center}} | ||
| + | ! Category !! Name !! Common Name !! Chance !! Favorability !! Min Time Before<br/>Repeat (days) | ||
| + | |- | ||
| + | | Disease || Flu || [[Flu]] || [[#DiseasesTable|varies by biome]] || Bad || [[#DiseasesTable|varies by biome]] | ||
| + | |- | ||
| + | | Disease || Plague || [[Plague]] || [[#DiseasesTable|varies by biome]] || Bad || [[#DiseasesTable|varies by biome]] | ||
| + | |- | ||
| + | | Disease || Malaria || [[Malaria]] || [[#DiseasesTable|varies by biome]] || Bad || [[#DiseasesTable|varies by biome]] | ||
| + | |- | ||
| + | | Disease || SleepingSickness|| [[Sleeping sickness|Sleeping Sickness]] || [[#DiseasesTable|varies by biome]] || Bad || [[#DiseasesTable|varies by biome]] | ||
| + | |- | ||
| + | | Big Threat || RaidEnemy || [[#Enemy Attack|Raid]] || 9.0 || Bad || 0 | ||
| + | |- | ||
| + | | Big Threat || AnimalInsanity || [[#Psychic Wave|Mad Animals!: (Animal name)]] || 1.0 || VeryBad || 1 | ||
| + | |- | ||
| + | | Big Threat || ShipPartCrash || [[#Ancient Ship Crash|Psychic ship]] || 1.5 || Bad || 30 | ||
| + | |- | ||
| + | | Big Threat || ManhunterPack || [[#Manhunter pack|Manhunter pack]] || 2.0 || Bad || 15 | ||
| + | |- | ||
| + | | Big Threat || Infestation || [[#Infestation|Infestation]] || 2.8 || Bad || 20 | ||
| + | |- | ||
| + | | Special || RaidFriendly || [[#Friendlies|Friendlies]] || 3 || Good || 0 | ||
| + | |- | ||
| + | | Small Threat || AnimalInsanitySingle || [[#Mad animal|Mad animal]] || 5 || Bad || 3 | ||
| + | |- | ||
| + | | Small Threat || ColdSnap || [[Cold snap]] || 3 || Bad || 30 | ||
| + | |- | ||
| + | | Small Threat || HeatWave || [[Heat wave]] || 3 || Bad || 30 | ||
| + | |- | ||
| + | | General Bad || Beavers || [[#Beavers!|Beavers!]] || 1 || Bad || 15 | ||
| + | |- | ||
| + | | General Bad || Eclipse || [[Eclipse]] || 3 || Bad || 30 | ||
| + | |- | ||
| + | | General Bad || SolarFlare || [[Solar flare]] || 1.5 || Bad || 30 | ||
| + | |- | ||
| + | | General Bad || PsychicDrone || [[Psychic drone]] || 1 || Bad || 30 | ||
| + | |- | ||
| + | | General Bad || ShortCircuit || [[Zzztt...]] || 1.2 || Bad || 15 | ||
| + | |- | ||
| + | | General Bad || CropBlight || [[#Blight|Blight]] || 2.5 || Bad || 8 | ||
| + | |- | ||
| + | | General Bad || ToxicFallout || [[Toxic fallout]] || 0.25 || Bad || 180 | ||
| + | |- | ||
| + | | General Bad || VolcanicWinter || [[Volcanic winter]] || 0.11 || Bad || 280 | ||
| + | |- | ||
| + | | General Good || TraderArrivalGeneral || [[#Trade Ship In Range|(Trader type)]] || 13 || Good || 0 | ||
| + | |- | ||
| + | | General Good || TraderArrivalSlaver || [[#Trader:(Trader type)|Slaver]] || 4.5 || Good || 0 | ||
| + | |- | ||
| + | | General Good || TravelerGroup || [[#Traveler Visit|Travelers]] || 8 || Good || 0 | ||
| + | |- | ||
| + | | General Good || VisitorGroup || [[#Faction Visit|Visitor(s)]] || 8 || Good || 0 | ||
| + | |- | ||
| + | | General Good || WandererJoin || [[#Migrant|Wanderer Join]] || 0.4 || VeryGood || 0 | ||
| + | |- | ||
| + | | General Good || ResourcePodCrash || [[#Cargo Pods|Cargo pods]] || 6.0 || Good || 0 | ||
| + | |- | ||
| + | | General Good || RefugeePodCrash || [[#Transport pod crash|Transport pod crash]] || 1.5 || Good || 0 | ||
| + | |- | ||
| + | | General Good || PsychicSoothe || [[Psychic soothe]] || 1.0 || Good || 30 | ||
| + | |- | ||
| + | | Neutral || RefugeeChased || [[#Refugee Chased|Refugee Chased]] || 2.5 || Neutral || 15 | ||
| + | |} | ||
| + | |||
| + | <span id="DiseasesTable"></span> | ||
{| class=wikitable style="text-align: center;" | {| class=wikitable style="text-align: center;" | ||
| Line 91: | Line 1,039: | ||
! style="padding: 5px 1em;" | Plague | ! style="padding: 5px 1em;" | Plague | ||
! style="padding: 5px 1em;" | Malaria | ! style="padding: 5px 1em;" | Malaria | ||
| − | ! style="padding: 5px 1em;" | Sleeping<br>Sickness | + | ! style="padding: 5px 1em;" | Sleeping<br/>Sickness |
| − | ! style="padding: 5px 1em;" | Fibrous<br>Mechanites | + | ! style="padding: 5px 1em;" | Fibrous<br/>Mechanites |
| − | ! style="padding: 5px 1em;" | Sensory<br>Mechanites | + | ! style="padding: 5px 1em;" | Sensory<br/>Mechanites |
| − | ! style="padding: 5px 1em;" | Gut<br>Worms | + | ! style="padding: 5px 1em;" | Gut<br/>Worms |
| − | ! style="padding: 5px 1em;" | Muscle<br>Parasites | + | ! style="padding: 5px 1em;" | Muscle<br/>Parasites |
| + | ! style="padding: 5px 1em;" | Organ<br/>Decay | ||
|- | |- | ||
| − | ! Arid Shrubland | + | ! Arid Shrubland{{#vardefine: as_mtb | 60}} |
| − | {{#vardefine: as_mtb | 60}} | ||
| {{#vardefineecho: as_flu | 100}} | | {{#vardefineecho: as_flu | 100}} | ||
| {{#vardefineecho: as_plague | 100}} | | {{#vardefineecho: as_plague | 100}} | ||
| Line 107: | Line 1,055: | ||
| {{#vardefineecho: as_gut | 60}} | | {{#vardefineecho: as_gut | 60}} | ||
| {{#vardefineecho: as_muscle | 60}} | | {{#vardefineecho: as_muscle | 60}} | ||
| + | | {{#vardefineecho: as_decay | 10}} | ||
|- | |- | ||
| − | ! Desert | + | ! Desert{{#vardefine: d_mtb | 80}} |
| − | {{#vardefine: d_mtb | 80}} | ||
| {{#vardefineecho: d_flu | 100}} | | {{#vardefineecho: d_flu | 100}} | ||
| {{#vardefineecho: d_plague | 100}} | | {{#vardefineecho: d_plague | 100}} | ||
| Line 118: | Line 1,066: | ||
| {{#vardefineecho: d_gut | 60}} | | {{#vardefineecho: d_gut | 60}} | ||
| {{#vardefineecho: d_muscle | 60}} | | {{#vardefineecho: d_muscle | 60}} | ||
| + | | {{#vardefineecho: d_decay | 10}} | ||
|- | |- | ||
| − | ! Extreme Desert | + | ! Extreme Desert{{#vardefine: ed_mtb | 90}} |
| − | {{#vardefine: ed_mtb | 90}} | ||
| {{#vardefineecho: ed_flu | 100}} | | {{#vardefineecho: ed_flu | 100}} | ||
| {{#vardefineecho: ed_plague | 80}} | | {{#vardefineecho: ed_plague | 80}} | ||
| Line 129: | Line 1,077: | ||
| {{#vardefineecho: ed_gut | 40}} | | {{#vardefineecho: ed_gut | 40}} | ||
| {{#vardefineecho: ed_muscle | 40}} | | {{#vardefineecho: ed_muscle | 40}} | ||
| + | | {{#vardefineecho: ed_decay | 10}} | ||
|- | |- | ||
| − | ! Boreal Forest | + | ! Boreal Forest{{#vardefine: bf_mtb | 50}} |
| − | {{#vardefine: bf_mtb | 50}} | ||
| {{#vardefineecho: bf_flu | 100}} | | {{#vardefineecho: bf_flu | 100}} | ||
| {{#vardefineecho: bf_plague | 100}} | | {{#vardefineecho: bf_plague | 100}} | ||
| Line 140: | Line 1,088: | ||
| {{#vardefineecho: bf_gut | 50}} | | {{#vardefineecho: bf_gut | 50}} | ||
| {{#vardefineecho: bf_muscle | 50}} | | {{#vardefineecho: bf_muscle | 50}} | ||
| + | | {{#vardefineecho: bf_decay | 10}} | ||
|- | |- | ||
| − | ! Tundra | + | ! Tundra{{#vardefine: t_mtb | 80}} |
| − | {{#vardefine: t_mtb | 80}} | ||
| {{#vardefineecho: t_flu | 100}} | | {{#vardefineecho: t_flu | 100}} | ||
| {{#vardefineecho: t_plague | 80}} | | {{#vardefineecho: t_plague | 80}} | ||
| Line 151: | Line 1,099: | ||
| {{#vardefineecho: t_gut | 30}} | | {{#vardefineecho: t_gut | 30}} | ||
| {{#vardefineecho: t_muscle | 30}} | | {{#vardefineecho: t_muscle | 30}} | ||
| + | | {{#vardefineecho: t_decay | 10}} | ||
|- | |- | ||
| − | ! Ice Sheet | + | ! Ice Sheet{{#vardefine: is_mtb | 90}} |
| − | {{#vardefine: is_mtb | 90}} | ||
| {{#vardefineecho: is_flu | 100}} | | {{#vardefineecho: is_flu | 100}} | ||
| {{#vardefineecho: is_plague | 80}} | | {{#vardefineecho: is_plague | 80}} | ||
| Line 162: | Line 1,110: | ||
| {{#vardefineecho: is_gut | 0}} | | {{#vardefineecho: is_gut | 0}} | ||
| {{#vardefineecho: is_muscle | 0}} | | {{#vardefineecho: is_muscle | 0}} | ||
| + | | {{#vardefineecho: is_decay | 10}} | ||
|- | |- | ||
| − | ! Tropical Rainforest | + | ! Sea Ice{{#vardefine: is_mtb | 80}} |
| − | {{#vardefine: tr_mtb | 30}} | + | | {{#vardefineecho: is_flu | 100}} |
| + | | {{#vardefineecho: is_plague | 80}} | ||
| + | | {{#vardefineecho: is_malaria | 0}} | ||
| + | | {{#vardefineecho: is_sleeping | 0}} | ||
| + | | {{#vardefineecho: is_fibrous | 30}} | ||
| + | | {{#vardefineecho: is_sensory | 30}} | ||
| + | | {{#vardefineecho: is_gut | 0}} | ||
| + | | {{#vardefineecho: is_muscle | 0}} | ||
| + | | {{#vardefineecho: is_decay | 10}} | ||
| + | |- | ||
| + | ! Temperate Forest{{#vardefine: tr_mtb | 45}} | ||
| + | | {{#vardefineecho: tr_flu | 100}} | ||
| + | | {{#vardefineecho: tr_plague | 100}} | ||
| + | | {{#vardefineecho: tr_malaria | 100}} | ||
| + | | {{#vardefineecho: is_sleeping | 0}} | ||
| + | | {{#vardefineecho: tr_fibrous | 30}} | ||
| + | | {{#vardefineecho: tr_sensory | 30}} | ||
| + | | {{#vardefineecho: tr_gut | 50}} | ||
| + | | {{#vardefineecho: tr_muscle | 50}} | ||
| + | | {{#vardefineecho: tr_decay | 10}} | ||
| + | |- | ||
| + | ! Tropical Rainforest{{#vardefine: tr_mtb | 30}} | ||
| {{#vardefineecho: tr_flu | 100}} | | {{#vardefineecho: tr_flu | 100}} | ||
| {{#vardefineecho: tr_plague | 100}} | | {{#vardefineecho: tr_plague | 100}} | ||
| Line 173: | Line 1,143: | ||
| {{#vardefineecho: tr_gut | 80}} | | {{#vardefineecho: tr_gut | 80}} | ||
| {{#vardefineecho: tr_muscle | 80}} | | {{#vardefineecho: tr_muscle | 80}} | ||
| + | | {{#vardefineecho: tr_decay | 10}} | ||
|} | |} | ||
| Line 190: | Line 1,161: | ||
|+ Mean time per disease by biome (in days) | |+ Mean time per disease by biome (in days) | ||
! style="padding: 5px 4em;" | Biome Name | ! style="padding: 5px 4em;" | Biome Name | ||
| − | ! style="padding: 5px 1em;" | Mean Time<br>Between Diseases | + | ! style="padding: 5px 1em;" | Mean Time<br/>Between Diseases |
! style="padding: 5px 1em;" | Flu | ! style="padding: 5px 1em;" | Flu | ||
! style="padding: 5px 1em;" | Plague | ! style="padding: 5px 1em;" | Plague | ||
! style="padding: 5px 1em;" | Malaria | ! style="padding: 5px 1em;" | Malaria | ||
| − | ! style="padding: 5px 1em;" | Sleeping<br>Sickness | + | ! style="padding: 5px 1em;" | Sleeping<br/>Sickness |
| − | ! style="padding: 5px 1em;" | Fibrous<br>Mechanites | + | ! style="padding: 5px 1em;" | Fibrous<br/>Mechanites |
| − | ! style="padding: 5px 1em;" | Sensory<br>Mechanites | + | ! style="padding: 5px 1em;" | Sensory<br/>Mechanites |
| − | ! style="padding: 5px 1em;" | Gut<br>Worms | + | ! style="padding: 5px 1em;" | Gut<br/>Worms |
| − | ! style="padding: 5px 1em;" | Muscle<br>Parasites | + | ! style="padding: 5px 1em;" | Muscle<br/>Parasites |
|- | |- | ||
| Arid Shrubland | | Arid Shrubland | ||
| {{#var: as_mtb}} | | {{#var: as_mtb}} | ||
| − | | {{#ifeq: {{#var: as_flu}}|0|0|{{#expr: {{#var: as_totweight}} / {{#var: as_flu}} * {{#var: as_mtb}} round 2}}}} | + | | {{#ifeq: {{#var: as_flu}}|0|0|{{#expr: {{#var: as_totweight}} / {{#var: as_flu}} * {{#var: as_mtb}} round 2}} }} |
| − | | {{#ifeq: {{#var: as_plague}}|0|0|{{#expr: {{#var: as_totweight}} / {{#var: as_plague}} * {{#var: as_mtb}} round 2}}}} | + | | {{#ifeq: {{#var: as_plague}}|0|0|{{#expr: {{#var: as_totweight}} / {{#var: as_plague}} * {{#var: as_mtb}} round 2}} }} |
| − | | {{#ifeq: {{#var: as_malaria}}|0|0|{{#expr: {{#var: as_totweight}} / {{#var: as_malaria}} * {{#var: as_mtb}} round 2}}}} | + | | {{#ifeq: {{#var: as_malaria}}|0|0|{{#expr: {{#var: as_totweight}} / {{#var: as_malaria}} * {{#var: as_mtb}} round 2}} }} |
| − | | {{#ifeq: {{#var: as_sleeping}}|0|0|{{#expr: {{#var: as_totweight}} / {{#var: as_sleeping}} * {{#var: as_mtb}} round 2}}}} | + | | {{#ifeq: {{#var: as_sleeping}}|0|0|{{#expr: {{#var: as_totweight}} / {{#var: as_sleeping}} * {{#var: as_mtb}} round 2}} }} |
| − | | {{#ifeq: {{#var: as_fibrous}}|0|0|{{#expr: {{#var: as_totweight}} / {{#var: as_fibrous}} * {{#var: as_mtb}} round 2}}}} | + | | {{#ifeq: {{#var: as_fibrous}}|0|0|{{#expr: {{#var: as_totweight}} / {{#var: as_fibrous}} * {{#var: as_mtb}} round 2}} }} |
| − | | {{#ifeq: {{#var: as_sensory}}|0|0|{{#expr: {{#var: as_totweight}} / {{#var: as_sensory}} * {{#var: as_mtb}} round 2}}}} | + | | {{#ifeq: {{#var: as_sensory}}|0|0|{{#expr: {{#var: as_totweight}} / {{#var: as_sensory}} * {{#var: as_mtb}} round 2}} }} |
| − | | {{#ifeq: {{#var: as_gut}}|0|0|{{#expr: {{#var: as_totweight}} / {{#var: as_gut}} * {{#var: as_mtb}} round 2}}}} | + | | {{#ifeq: {{#var: as_gut}}|0|0|{{#expr: {{#var: as_totweight}} / {{#var: as_gut}} * {{#var: as_mtb}} round 2}} }} |
| − | | {{#ifeq: {{#var: as_muscle}}|0|0|{{#expr: {{#var: as_totweight}} / {{#var: as_muscle}} * {{#var: as_mtb}} round 2}}}} | + | | {{#ifeq: {{#var: as_muscle}}|0|0|{{#expr: {{#var: as_totweight}} / {{#var: as_muscle}} * {{#var: as_mtb}} round 2}} }} |
|- | |- | ||
| Desert | | Desert | ||
| {{#var: d_mtb}} | | {{#var: d_mtb}} | ||
| − | | {{#ifeq: {{#var: d_flu}}|0|0|{{#expr: {{#var: d_totweight}} / {{#var: d_flu}} * {{#var: d_mtb}} round 2}}}} | + | | {{#ifeq: {{#var: d_flu}}|0|0|{{#expr: {{#var: d_totweight}} / {{#var: d_flu}} * {{#var: d_mtb}} round 2}} }} |
| − | | {{#ifeq: {{#var: d_plague}}|0|0|{{#expr: {{#var: d_totweight}} / {{#var: d_plague}} * {{#var: d_mtb}} round 2}}}} | + | | {{#ifeq: {{#var: d_plague}}|0|0|{{#expr: {{#var: d_totweight}} / {{#var: d_plague}} * {{#var: d_mtb}} round 2}} }} |
| − | | {{#ifeq: {{#var: d_malaria}}|0|0|{{#expr: {{#var: d_totweight}} / {{#var: d_malaria}} * {{#var: d_mtb}} round 2}}}} | + | | {{#ifeq: {{#var: d_malaria}}|0|0|{{#expr: {{#var: d_totweight}} / {{#var: d_malaria}} * {{#var: d_mtb}} round 2}} }} |
| − | | {{#ifeq: {{#var: d_sleeping}}|0|0|{{#expr: {{#var: d_totweight}} / {{#var: d_sleeping}} * {{#var: d_mtb}} round 2}}}} | + | | {{#ifeq: {{#var: d_sleeping}}|0|0|{{#expr: {{#var: d_totweight}} / {{#var: d_sleeping}} * {{#var: d_mtb}} round 2}} }} |
| − | | {{#ifeq: {{#var: d_fibrous}}|0|0|{{#expr: {{#var: d_totweight}} / {{#var: d_fibrous}} * {{#var: d_mtb}} round 2}}}} | + | | {{#ifeq: {{#var: d_fibrous}}|0|0|{{#expr: {{#var: d_totweight}} / {{#var: d_fibrous}} * {{#var: d_mtb}} round 2}} }} |
| − | | {{#ifeq: {{#var: d_sensory}}|0|0|{{#expr: {{#var: d_totweight}} / {{#var: d_sensory}} * {{#var: d_mtb}} round 2}}}} | + | | {{#ifeq: {{#var: d_sensory}}|0|0|{{#expr: {{#var: d_totweight}} / {{#var: d_sensory}} * {{#var: d_mtb}} round 2}} }} |
| − | | {{#ifeq: {{#var: d_gut}}|0|0|{{#expr: {{#var: d_totweight}} / {{#var: d_gut}} * {{#var: d_mtb}} round 2}}}} | + | | {{#ifeq: {{#var: d_gut}}|0|0|{{#expr: {{#var: d_totweight}} / {{#var: d_gut}} * {{#var: d_mtb}} round 2}} }} |
| − | | {{#ifeq: {{#var: d_muscle}}|0|0|{{#expr: {{#var: d_totweight}} / {{#var: d_muscle}} * {{#var: d_mtb}} round 2}}}} | + | | {{#ifeq: {{#var: d_muscle}}|0|0|{{#expr: {{#var: d_totweight}} / {{#var: d_muscle}} * {{#var: d_mtb}} round 2}} }} |
|- | |- | ||
| Extreme Desert | | Extreme Desert | ||
| {{#var: ed_mtb}} | | {{#var: ed_mtb}} | ||
| − | | {{#ifeq: {{#var: ed_flu}}|0|0|{{#expr: {{#var: ed_totweight}} / {{#var: ed_flu}} * {{#var: ed_mtb}} round 2}}}} | + | | {{#ifeq: {{#var: ed_flu}}|0|0|{{#expr: {{#var: ed_totweight}} / {{#var: ed_flu}} * {{#var: ed_mtb}} round 2}} }} |
| − | | {{#ifeq: {{#var: ed_plague}}|0|0|{{#expr: {{#var: ed_totweight}} / {{#var: ed_plague}} * {{#var: ed_mtb}} round 2}}}} | + | | {{#ifeq: {{#var: ed_plague}}|0|0|{{#expr: {{#var: ed_totweight}} / {{#var: ed_plague}} * {{#var: ed_mtb}} round 2}} }} |
| − | | {{#ifeq: {{#var: ed_malaria}}|0|0|{{#expr: {{#var: ed_totweight}} / {{#var: ed_malaria}} * {{#var: ed_mtb}} round 2}}}} | + | | {{#ifeq: {{#var: ed_malaria}}|0|0|{{#expr: {{#var: ed_totweight}} / {{#var: ed_malaria}} * {{#var: ed_mtb}} round 2}} }} |
| − | | {{#ifeq: {{#var: ed_sleeping}}|0|0|{{#expr: {{#var: ed_totweight}} / {{#var: ed_sleeping}} * {{#var: ed_mtb}} round 2}}}} | + | | {{#ifeq: {{#var: ed_sleeping}}|0|0|{{#expr: {{#var: ed_totweight}} / {{#var: ed_sleeping}} * {{#var: ed_mtb}} round 2}} }} |
| − | | {{#ifeq: {{#var: ed_fibrous}}|0|0|{{#expr: {{#var: ed_totweight}} / {{#var: ed_fibrous}} * {{#var: ed_mtb}} round 2}}}} | + | | {{#ifeq: {{#var: ed_fibrous}}|0|0|{{#expr: {{#var: ed_totweight}} / {{#var: ed_fibrous}} * {{#var: ed_mtb}} round 2}} }} |
| − | | {{#ifeq: {{#var: ed_sensory}}|0|0|{{#expr: {{#var: ed_totweight}} / {{#var: ed_sensory}} * {{#var: ed_mtb}} round 2}}}} | + | | {{#ifeq: {{#var: ed_sensory}}|0|0|{{#expr: {{#var: ed_totweight}} / {{#var: ed_sensory}} * {{#var: ed_mtb}} round 2}} }} |
| − | | {{#ifeq: {{#var: ed_gut}}|0|0|{{#expr: {{#var: ed_totweight}} / {{#var: ed_gut}} * {{#var: ed_mtb}} round 2}}}} | + | | {{#ifeq: {{#var: ed_gut}}|0|0|{{#expr: {{#var: ed_totweight}} / {{#var: ed_gut}} * {{#var: ed_mtb}} round 2}} }} |
| − | | {{#ifeq: {{#var: ed_muscle}}|0|0|{{#expr: {{#var: ed_totweight}} / {{#var: ed_muscle}} * {{#var: ed_mtb}} round 2}}}} | + | | {{#ifeq: {{#var: ed_muscle}}|0|0|{{#expr: {{#var: ed_totweight}} / {{#var: ed_muscle}} * {{#var: ed_mtb}} round 2}} }} |
|- | |- | ||
| Boreal Forest | | Boreal Forest | ||
| {{#var: bf_mtb}} | | {{#var: bf_mtb}} | ||
| − | | {{#ifeq: {{#var: bf_flu}}|0|0|{{#expr: {{#var: bf_totweight}} / {{#var: bf_flu}} * {{#var: bf_mtb}} round 2}}}} | + | | {{#ifeq: {{#var: bf_flu}}|0|0|{{#expr: {{#var: bf_totweight}} / {{#var: bf_flu}} * {{#var: bf_mtb}} round 2}} }} |
| − | | {{#ifeq: {{#var: bf_plague}}|0|0|{{#expr: {{#var: bf_totweight}} / {{#var: bf_plague}} * {{#var: bf_mtb}} round 2}}}} | + | | {{#ifeq: {{#var: bf_plague}}|0|0|{{#expr: {{#var: bf_totweight}} / {{#var: bf_plague}} * {{#var: bf_mtb}} round 2}} }} |
| − | | {{#ifeq: {{#var: bf_malaria}}|0|0|{{#expr: {{#var: bf_totweight}} / {{#var: bf_malaria}} * {{#var: bf_mtb}} round 2}}}} | + | | {{#ifeq: {{#var: bf_malaria}}|0|0|{{#expr: {{#var: bf_totweight}} / {{#var: bf_malaria}} * {{#var: bf_mtb}} round 2}} }} |
| − | | {{#ifeq: {{#var: bf_sleeping}}|0|0|{{#expr: {{#var: bf_totweight}} / {{#var: bf_sleeping}} * {{#var: bf_mtb}} round 2}}}} | + | | {{#ifeq: {{#var: bf_sleeping}}|0|0|{{#expr: {{#var: bf_totweight}} / {{#var: bf_sleeping}} * {{#var: bf_mtb}} round 2}} }} |
| − | | {{#ifeq: {{#var: bf_fibrous}}|0|0|{{#expr: {{#var: bf_totweight}} / {{#var: bf_fibrous}} * {{#var: bf_mtb}} round 2}}}} | + | | {{#ifeq: {{#var: bf_fibrous}}|0|0|{{#expr: {{#var: bf_totweight}} / {{#var: bf_fibrous}} * {{#var: bf_mtb}} round 2}} }} |
| − | | {{#ifeq: {{#var: bf_sensory}}|0|0|{{#expr: {{#var: bf_totweight}} / {{#var: bf_sensory}} * {{#var: bf_mtb}} round 2}}}} | + | | {{#ifeq: {{#var: bf_sensory}}|0|0|{{#expr: {{#var: bf_totweight}} / {{#var: bf_sensory}} * {{#var: bf_mtb}} round 2}} }} |
| − | | {{#ifeq: {{#var: bf_gut}}|0|0|{{#expr: {{#var: bf_totweight}} / {{#var: bf_gut}} * {{#var: bf_mtb}} round 2}}}} | + | | {{#ifeq: {{#var: bf_gut}}|0|0|{{#expr: {{#var: bf_totweight}} / {{#var: bf_gut}} * {{#var: bf_mtb}} round 2}} }} |
| − | | {{#ifeq: {{#var: bf_muscle}}|0|0|{{#expr: {{#var: bf_totweight}} / {{#var: bf_muscle}} * {{#var: bf_mtb}} round 2}}}} | + | | {{#ifeq: {{#var: bf_muscle}}|0|0|{{#expr: {{#var: bf_totweight}} / {{#var: bf_muscle}} * {{#var: bf_mtb}} round 2}} }} |
|- | |- | ||
| Tundra | | Tundra | ||
| {{#var: t_mtb}} | | {{#var: t_mtb}} | ||
| − | | {{#ifeq: {{#var: t_flu}}|0|0|{{#expr: {{#var: t_totweight}} / {{#var: t_flu}} * {{#var: t_mtb}} round 2}}}} | + | | {{#ifeq: {{#var: t_flu}}|0|0|{{#expr: {{#var: t_totweight}} / {{#var: t_flu}} * {{#var: t_mtb}} round 2}} }} |
| − | | {{#ifeq: {{#var: t_plague}}|0|0|{{#expr: {{#var: t_totweight}} / {{#var: t_plague}} * {{#var: t_mtb}} round 2}}}} | + | | {{#ifeq: {{#var: t_plague}}|0|0|{{#expr: {{#var: t_totweight}} / {{#var: t_plague}} * {{#var: t_mtb}} round 2}} }} |
| − | | {{#ifeq: {{#var: t_malaria}}|0|0|{{#expr: {{#var: t_totweight}} / {{#var: t_malaria}} * {{#var: t_mtb}} round 2}}}} | + | | {{#ifeq: {{#var: t_malaria}}|0|0|{{#expr: {{#var: t_totweight}} / {{#var: t_malaria}} * {{#var: t_mtb}} round 2}} }} |
| − | | {{#ifeq: {{#var: t_sleeping}}|0|0|{{#expr: {{#var: t_totweight}} / {{#var: t_sleeping}} * {{#var: t_mtb}} round 2}}}} | + | | {{#ifeq: {{#var: t_sleeping}}|0|0|{{#expr: {{#var: t_totweight}} / {{#var: t_sleeping}} * {{#var: t_mtb}} round 2}} }} |
| − | | {{#ifeq: {{#var: t_fibrous}}|0|0|{{#expr: {{#var: t_totweight}} / {{#var: t_fibrous}} * {{#var: t_mtb}} round 2}}}} | + | | {{#ifeq: {{#var: t_fibrous}}|0|0|{{#expr: {{#var: t_totweight}} / {{#var: t_fibrous}} * {{#var: t_mtb}} round 2}} }} |
| − | | {{#ifeq: {{#var: t_sensory}}|0|0|{{#expr: {{#var: t_totweight}} / {{#var: t_sensory}} * {{#var: t_mtb}} round 2}}}} | + | | {{#ifeq: {{#var: t_sensory}}|0|0|{{#expr: {{#var: t_totweight}} / {{#var: t_sensory}} * {{#var: t_mtb}} round 2}} }} |
| − | | {{#ifeq: {{#var: t_gut}}|0|0|{{#expr: {{#var: t_totweight}} / {{#var: t_gut}} * {{#var: t_mtb}} round 2}}}} | + | | {{#ifeq: {{#var: t_gut}}|0|0|{{#expr: {{#var: t_totweight}} / {{#var: t_gut}} * {{#var: t_mtb}} round 2}} }} |
| − | | {{#ifeq: {{#var: t_muscle}}|0|0|{{#expr: {{#var: t_totweight}} / {{#var: t_muscle}} * {{#var: t_mtb}} round 2}}}} | + | | {{#ifeq: {{#var: t_muscle}}|0|0|{{#expr: {{#var: t_totweight}} / {{#var: t_muscle}} * {{#var: t_mtb}} round 2}} }} |
|- | |- | ||
| Ice Sheet | | Ice Sheet | ||
| Line 268: | Line 1,239: | ||
| Tropical Rainforest | | Tropical Rainforest | ||
| {{#var: tr_mtb}} | | {{#var: tr_mtb}} | ||
| − | | {{#ifeq: {{#var: tr_flu}}|0|0|{{#expr: {{#var: tr_totweight}} / {{#var: tr_flu}} * {{#var: tr_mtb}} round 2}}}} | + | | {{#ifeq: {{#var: tr_flu}}|0|0|{{#expr: {{#var: tr_totweight}} / {{#var: tr_flu}} * {{#var: tr_mtb}} round 2}} }} |
| − | | {{#ifeq: {{#var: tr_plague}}|0|0|{{#expr: {{#var: tr_totweight}} / {{#var: tr_plague}} * {{#var: tr_mtb}} round 2}}}} | + | | {{#ifeq: {{#var: tr_plague}}|0|0|{{#expr: {{#var: tr_totweight}} / {{#var: tr_plague}} * {{#var: tr_mtb}} round 2}} }} |
| − | | {{#ifeq: {{#var: tr_malaria}}|0|0|{{#expr: {{#var: tr_totweight}} / {{#var: tr_malaria}} * {{#var: tr_mtb}} round 2}}}} | + | | {{#ifeq: {{#var: tr_malaria}}|0|0|{{#expr: {{#var: tr_totweight}} / {{#var: tr_malaria}} * {{#var: tr_mtb}} round 2}} }} |
| − | | {{#ifeq: {{#var: tr_sleeping}}|0|0|{{#expr: {{#var: tr_totweight}} / {{#var: tr_sleeping}} * {{#var: tr_mtb}} round 2}}}} | + | | {{#ifeq: {{#var: tr_sleeping}}|0|0|{{#expr: {{#var: tr_totweight}} / {{#var: tr_sleeping}} * {{#var: tr_mtb}} round 2}} }} |
| − | | {{#ifeq: {{#var: tr_fibrous}}|0|0|{{#expr: {{#var: tr_totweight}} / {{#var: tr_fibrous}} * {{#var: tr_mtb}} round 2}}}} | + | | {{#ifeq: {{#var: tr_fibrous}}|0|0|{{#expr: {{#var: tr_totweight}} / {{#var: tr_fibrous}} * {{#var: tr_mtb}} round 2}} }} |
| − | | {{#ifeq: {{#var: tr_sensory}}|0|0|{{#expr: {{#var: tr_totweight}} / {{#var: tr_sensory}} * {{#var: tr_mtb}} round 2}}}} | + | | {{#ifeq: {{#var: tr_sensory}}|0|0|{{#expr: {{#var: tr_totweight}} / {{#var: tr_sensory}} * {{#var: tr_mtb}} round 2}} }} |
| − | | {{#ifeq: {{#var: tr_gut}}|0|0|{{#expr: {{#var: tr_totweight}} / {{#var: tr_gut}} * {{#var: tr_mtb}} round 2}}}} | + | | {{#ifeq: {{#var: tr_gut}}|0|0|{{#expr: {{#var: tr_totweight}} / {{#var: tr_gut}} * {{#var: tr_mtb}} round 2}} }} |
| − | | {{#ifeq: {{#var: tr_muscle}}|0|0|{{#expr: {{#var: tr_totweight}} / {{#var: tr_muscle}} * {{#var: tr_mtb}} round 2}}}} | + | | {{#ifeq: {{#var: tr_muscle}}|0|0|{{#expr: {{#var: tr_totweight}} / {{#var: tr_muscle}} * {{#var: tr_mtb}} round 2}} }} |
|} | |} | ||
| + | </div> | ||
| − | = | + | == Version history == |
| − | + | * [[Version/0.0.245|0.0.245]] - Electrical devices now short-circuit and cause fires if left out in the rain while running. | |
| − | + | * [[Version/0.8.657|0.8.657]] - [[#Alphabeavers|Beavers!]] event added | |
| − | + | * [[Version/0.11.877|0.11.877]] - [[Toxic fallout]], [[#Volcanic winter|Volcanic winter]], [[#Refugee Chased at (Settlement)|Chased refugee]], [[#Psychic soothe|Psychic sooth]], [[#Manhunter Pack|Manhunter pack]] events added. Manhunter pack is exclusively made up of [[warg]]s. | |
| − | + | * [[Version/0.12.906|0.12.906]] - [[#Manhunter Pack|Manhunter pack]]s can use animals besides wargs. [[#(Animals) join|Farm Animals Wander In]], [[#(Animal) self-tamed|Self Tame]], [[Poison ship]] and [[#Flashstorm|Flashtorm]] events added. Animals join is exclusive to farm animals at this point. | |
| − | + | * [[Version/0.12.910|0.12.910]] - [[Poison ship]] now only drops one ship part instead of 2-3. | |
| − | + | * [[Version/0.12.914|0.12.914]] - [[#Flashstorm|Flashtorm]] are much less intense | |
| − | + | * [[Version/0.14.1236|0.14.1236]] - Fixed [[Version/0.14.1236#Changes|many events]] never firing. Threat cycle event maker will no longer queue events it doesn't have the points to fire. | |
| − | + | * [[Version/0.14.1241|0.14.1241]] - Toxic fallout, flashstorm and volcanic winter are now disabled in Free Play [[difficulty]]. Toxic fallout and volcanic winter are now rarer. | |
| − | + | * [[Version/1.1.0|1.1.0]] - Pawns now sometimes take the family name of their partner upon marriage | |
| − | + | * [[Version/1.1.2654|1.1.2654]] - Increase toxic fallout earliestDay from 20 to 60. Increase volcanic winter earliest day from 30 to 60. | |
| − | + | * [[Version/1.3.3066|1.3.3066]] - Fix: The [[#Beavers!|Alphabeaver]] event will still happen even if the outdoor temperature is below their minimum comfortable temperature. | |
| − | + | * [[Version/1.4.3523|1.4.3523]] - Fix: Stranger in black can have 0 shooting skill. | |
| − | |||
| − | |||
| − | |||
| − | |||
| − | |||
| − | |||
| − | |||
| − | |||
| − | |||
| − | |||
| − | |||
| − | |||
| − | |||
| − | |||
| − | |||
| − | |||
| − | |||
| − | |||
| − | |||
| − | |||
| − | |||
| − | |||
| − | |||
| − | |||
| − | |||
| − | |||
| − | |||
| − | |||
| − | |||
| − | |||
| − | |||
| − | |||
| − | |||
| − | |||
| − | |||
| − | |||
| − | |||
| − | |||
| − | |||
| − | |||
| − | |||
| − | |||
| − | *[[ | ||
| − | |||
| − | |||
| − | |||
| − | |||
| − | |||
| − | |||
| − | |||
| − | |||
| − | |||
| − | |||
| − | |||
| − | |||
| − | |||
| − | |||
| − | |||
| − | |||
| − | |||
| − | |||
| − | |||
| − | |||
| − | |||
| − | |||
| − | |||
| − | |||
| − | |||
| − | |||
| − | |||
| − | |||
| − | |||
| − | |||
| − | |||
| − | |||
| − | |||
| − | |||
| − | |||
| − | |||
| − | |||
| − | |||
| − | |||
| − | |||
| − | |||
| − | |||
| − | |||
| − | |||
| − | |||
| − | |||
| − | |||
| − | |||
| − | |||
| − | |||
| − | |||
| − | |||
| − | |||
| − | |||
| − | |||
| − | |||
| − | |||
| − | |||
| − | |||
| − | |||
| − | |||
| − | |||
| − | |||
| − | |||
| − | |||
| − | |||
| − | |||
| − | |||
| − | |||
| − | |||
| − | |||
| − | |||
| − | |||
| − | |||
| − | |||
| − | |||
| − | |||
| − | |||
| − | |||
| − | |||
| − | |||
| − | |||
| − | |||
| − | |||
| − | |||
| − | |||
| − | |||
| − | |||
| − | |||
| − | |||
| − | |||
| − | |||
| − | |||
| − | |||
| − | Toxic | ||
| − | |||
| − | |||
| − | |||
| − | |||
| − | |||
| − | |||
| − | |||
| − | |||
| − | |||
| − | |||
| − | |||
| − | |||
| − | |||
| − | |||
| − | |||
| − | |||
| − | |||
| − | |||
| − | |||
| − | |||
| − | |||
| − | |||
| − | |||
| − | |||
| − | |||
| − | |||
| − | |||
| − | |||
| − | |||
| − | |||
| − | |||
| − | |||
| − | |||
| − | |||
| − | |||
| − | |||
| − | |||
| − | |||
| − | |||
| − | |||
| − | |||
| − | |||
| − | |||
| − | |||
| − | |||
| − | |||
| − | |||
| − | |||
| − | |||
| − | |||
| − | |||
| − | |||
| − | |||
| − | |||
| − | |||
| − | |||
| − | |||
| − | |||
| − | |||
| − | [[Category: | + | [[Category:Game mechanics]] |
Latest revision as of 08:19, 6 October 2024
|
| This article is a stub. You can help RimWorld Wiki by expanding it. Reason: Ideology events. Recover lost content from major rewrite OR revert to prior to rewrite. |
Events are driven by the currently selected AI storyteller.
Most events that occur create a Letter, an envelope icon on the right side of the screen. Other events will pause the game and pop up a window where the player must make a choice. Usually, the color of the envelope will suggest the severity of the event; blue envelopes are good events, grey is neutral, yellow is bad, and red denotes direct threats.
Many event titles are variable. They can mention location, pawn and faction names, specific buffs or debuffs, or even have countdowns for the time variable events.
There's a special kind of events called Quests which work under different rules.
Event List [edit]
For ease of navigation, events are subdivided into 3 groups: Storyteller events, Incidental events, and World events.
Storyteller events[edit]
These events are controlled by the selected storyteller. Major and Weather events require at least the Builder difficulty to be able to trigger.
Due to wiki limitations, it isn't possible to link directly to a collapsed section. To address that, this toggle will open all relevant sections.
| Event Name | Category | Location | Favorability | Duration | Cooldown (days) |
Mood Related |
Notes |
|---|---|---|---|---|---|---|---|
| Enemy attack | Major | Colony Map | Also called "raids". | ||||
| Infestation | Major | Colony Map | Until destruction | The event "Too Deep: Infestation" is unrelated. | |||
| Wastepack infestations | Major | Colony Map | Until destruction | Requires Biotech | |||
| Manhunter pack | Major | Colony Map | 24-54 hours, or until destruction | Animals are infected with scaria | |||
| Psychic wave | Major | Colony Map | Until affected animals are incapacitated or die | There's a variant that affects a single animal, which is not considered a major threat. | |||
| Crashed ship part | Major | Colony Map | Until destruction | 2 variants: Defoliator ship and Psychic ship. Only the latter affects mood. | |||
| Mech cluster | Major | Colony Map | Until Destruction | Requires Royalty | |||
| Problem causer | Major | World | Until Destruction | Requires Royalty | |||
| Flashstorm | Weather | Colony Map | 0.075 - 0.1 days | 15
|
|||
| Toxic fallout | Weather | Colony Map | 2.5 - 10.5 days | 90
|
Insectoids/Mechanoids are immune. | ||
| Volcanic winter | Weather | Colony Map | 7.5 - 40 days | 140
|
|||
| Ambrosia sprout | Random | Colony Map | Good | Limited to 6 biomes: Tropical rainforest/swamp, Temperate forest/swamp, Boreal forest, Arid shrubland | |||
| Animals join | Random | Colony Map | Good | ||||
| Animal self-tamed | Random | Colony Map | Good | ||||
| Aurora | Random | Colony Map | Good | 0.125 - 0.35 days | |||
| Cargo pods | Random | Colony Map | Good | ||||
| Herd migration: (Animal) | Random | Colony Map | Good | Only happens on 5 biomes: Sea ice, Ice sheet, Tundra, Desert, Extreme desert | |||
| Party | Random | Colony Map | Good | Requires a party spot or any gathering spot | |||
| Psychic soothe | Random | Colony Map | Good | 15
|
|||
| (Trader type) | Random | Colony Map | Good | Orbital Trader | |||
| (Trader type) from (Faction) | Random | Colony Map | Good | Land Trader | |||
| Transport pod crash | Random | Colony Map | Good | ||||
| Paralytic abasia | Random | Colony Map | Good | Requires Royalty | |||
| Baby | Random | Colony Map | Good | Requires Biotech | |||
| Wanderer joins | Random | Colony Map | Good | 24 hours | |||
| Wild (wo)man wanders in | Random | Colony Map | Good | ||||
| Traveler Visit | Random | Colony Map | Good | ||||
| Visitor(s) | Random | Colony Map | Good | ||||
| Royal Tribute Collector | Random | Colony Map | Good | Requires Royalty | |||
| Gauranlen pod sprout | Random | Colony Map | Good | Requires Ideology | |||
| Polux tree sprout | Random | Colony Map | Good | Requires Biotech | |||
| Beavers! | Random | Colony Map | Bad | 30
|
|||
| Birthday | Random | Colony Map | Bad | ||||
| Blight | Random | Colony Map | Bad | 30
|
|||
| Disease | Random | Colony Map | Bad | ||||
| Eclipse | Random | Colony Map | Bad | 0.75 - 1.25 days | 15
|
Only affects mood with the Precept | |
| Heat wave | Random | Colony Map | Bad | 1.5 - 3.5 days | 30
|
It requires a summer temperature above 20 °C (68 °F) | |
| Cold snap | Random | Colony Map | Bad | 1.5 - 3.5 days | 30
|
It requires a summer temperature between 0 °C – 15 °C (32 °F – 59 °F) | |
| Mad animal | Random | Colony Map | Bad | ||||
| Psychic drone | Random | Colony Map | Bad | 0.75 - 1.75 days | 15
|
||
| Solar flare | Random | Colony Map | Bad | 0.15 - 0.5 days | Incompatible with Unnatural Darkness (Anomaly | ||
| Zzztt... | Random | Colony Map | Bad | 8
|
Cooldown does not apply to Short-circuits caused by snow/rain, | ||
| Transport pod crash (Ghoul) | Random | Colony Map | Bad | Requires Anomaly | |||
| Gray pall | Random | Colony Map | Bad | Requires Anomaly |
1: Only one variant affects mood
2: Only while outside
Incidental events[edit]
- For a detailled list of these events, see Events/Incidental.
Rather than being triggered by storytellers, these events come from various other mechanics.
| Event Name | Type | Location | Notes |
|---|---|---|---|
| Friendlies | Good | Colony Map | |
| Masterwork | Good | Colony Map | |
| Legendary work | Good | Colony Map | |
| Man in Black | Good | Colony Map | Has a year (60 days) of cooldown. |
| New recruit | Good | Colony Map | |
| Meteorite | Good | Colony Map | About 1 year cooldown |
| Outpost destroyed | Good | World | Becomes "Faction Defeated" if that was the last outpost of said faction. |
| Ransom (Time remaining) | Good | Colony Map | Available for 24 hours |
| Rare thrumbos | Good | Colony Map | 13 days of cooldown |
| Reactor ready | Good | Colony Map | 15 days after warming up a ship reactor |
| Ship chunks | Good | Colony Map | |
| Trauma savant | Good | Anywhere | |
| Quest completed | Good | Anywhere | |
| Anima tree sprout | Good | Colony Map | Requires Royalty |
| Ancient danger | Bad | Colony Map | Once per map. |
| Animal revenge | Bad | Colony Map | |
| Death | Bad | Anywhere | Slaughtering and Euthanizing a colonist does not trigger this. |
| Drug addiction | Bad | Anywhere | |
| Heart attack | Bad | Anywhere | |
| Mental Break | Bad | Anywhere | |
| Overdose | Bad | Anywhere | |
| Predator hunting | Bad | Colony Map | Requires a predator on the map |
| Prison break | Bad | Colony Map | Requires having prisoners |
| Roof collapsed | Bad | Colony Map | |
| Too Deep: Infestation | Bad | Colony Map | Triggered by deep drill |
| Allied: (Faction) | Faction | Anywhere | Requires to improve relations <-75 |
| Enemy now neutral: (Faction) | Faction | Anywhere | |
| Hostile faction | Faction | Anywhere | Requires to worsen relations >75 |
| Leader died | Faction | Anywhere | Triggers on another faction's leader death. |
| New Leader | Faction | Anywhere | Trigger once recruiting another faction's leader. |
| About: Electricity | Informational | Anywhere | |
| About: Getting advanced components | Informational | Anywhere | |
| New About: Launching the ship | Informational | Anywhere | |
| Persona Core Offer | Informational | Anywhere | Requires >40 goodwill with some faction |
| Summer | Informational | Anywhere | |
| Unwaveringly loyal | Informational | Anywhere | |
| About: Anima tree linking | Informational | Anywhere | Requires Royalty |
| Baby Prep | Informational | Anywhere | Requires Biotech |
| New lovers | Social | Anywhere | Affects mood |
| Breakup | Social | Anywhere | Affects mood |
| Rejected proposal | Social | Anywhere | Affects mood |
| Marriage is on! | Social | Anywhere | Affects mood |
| Affair | Social | Anywhere | Affects mood |
| Divorce | Social | Anywhere | Affects mood |
World events[edit]
- For a guide to survive these events, see World Quests Guide.
This is a list of all events that can happen while on the overworld. Some events require a quest to trigger. Sub events are not quest events on their own, but may happen during other world events such as Incapacitated Refugee or Item Stash Opportunity.
Due to wiki limitations, it isn't possible to link directly to a collapsed section. To address that, this toggle will open all relevant sections.
| Event Name | Type | Location | Notes |
|---|---|---|---|
| Attack begun | Notification | Generated Map | |
| Bandit camp opportunity | Quest | Anywhere | |
| Caravan ambushed / (manhunters) | Battle | Generated Map | Prevents reforming caravan while active |
| Caravan battle won | Notification | Anywhere | Allows reforming the caravan on the world map |
| Caravan arrived at (Location) | Notification | Anywhere | |
| Caravan lost | Notification | Anywhere | |
| Caravan meeting by (Caravan ID) | Pop-up window | World | |
| Caravan ready | Notification | Anywhere | |
| Demand | Hostile | World | |
| Peace talks | Quest | World | Expires on 15 days |
| Rescuee joins | Notification | Anywhere | |
| Ambush | Sub-event | Generated Map | |
| Sleeping mechanoids | Sub-event | Generated Map |
Anomaly events[edit]
| This article relates to content added by Anomaly (DLC). Please note that it will not be present without the DLC enabled. |
- For the complete list of events, see Events/Anomaly.
Events from the Anomaly![]() DLC work different from normal events and are intrinsically related to the Monolith structure. Due to this, all Anomaly events will be listed on its own page.
DLC work different from normal events and are intrinsically related to the Monolith structure. Due to this, all Anomaly events will be listed on its own page.
Major threats[edit]
Major threats can appear from Base Builder difficulty onwards. They mostly consist of direct attacks to your colony. Their size depends on the raid points mechanic; generally increasing in strength with wealth, colonist count, and difficulty.
Cassandra Classic and Phoebe Chillax both treat major threats separately from other events; they cycle between "OnDays" and "OffDays", where a certain amount of major events will occur during each OnDay cycle. Randy Random simply treats a major threat as an event that's less likely to happen.
Major threats generation[edit]
Major threats can be fired via 3 different methods: storyteller, quest, and special fired. Storyteller major threats are fired according to the Storyteller's schedule. Randy's "schedule" is a random firing mechanic. Quest major threats must be explicitly accepted by the player. Special fired major threats are limited to Wastepack Infestations that can spawn when a wastepack deteriorates (Biotech DLC![]() ).
).
For Storyteller fired major threats, first the storyteller determines which type of major threat is to be sent. Each type of major threat has a specific weight. Some major threats may not be possible at a specific time and would have a weight of 0. For example, Infestations and Mass Animal Insanity each require specific conditions that may not be met. Some major threats are gated behind Raid Point amounts. Infestations and Mechanoid Droner, Defoliator and Clusters all required at least 400 Raid Points.
| Raid type | Vanilla | DLC enabled |
|---|---|---|
| Raid | 7.40 | 7.40 |
| DefoliatorShip | 2.00 | 0.40 |
| DronerShip | 2.00 | 0.40 |
| MechCluster |
0.00 | 1.90 |
| Manhunter | 2.00 | 2.00 |
| MassInsanity | 1.30 | 1.30 |
| Infest | 2.70 | 2.70 |
| Wastepack Infest |
0.00 | 0.024 |
| Problem Causer |
0.00 | 0.95 |
Raid Generation[edit]
After the storyteller has chosen to fire a major threat, and chosen to fire a raid, first the Faction of the Raid is chosen. Each faction is given a weight and all hostile factions are considered separately. Human factions each have a weight of 1. The mechanoid faction's weight changes with raid Points. As Raid Points go up the weight of the Mechanoid Faction Increases. Mechanoids weight is 0 until 300 raid points. The weight of human factions can become 0 at extreme temperatures.
After the faction is chosen, the attack type is chosen. Each attack type has a weight. Some factions do not have all possible attack types. For example, Tribals cannot Siege. After the attack type is chosen, arrival method is chosen. Each arrival method has a weight. Some weights change based on raid points. Some arrival methods are not possible with some factions. Some attack types only arrive via certain methods.
Once Rimworld has determined the faction, attack type and arrival type, a Raid Composition is selected. Each faction has defined raid compositions like the "all sniper" or "all melee attack".
Enemy attack[edit]
Commonly known as a raid, this event comes in several types. It is possible for multiple raids to happen at the same time, even of opposing factions. Raiders will come and assault your colony, first attacking adult colonists that they can walk to, then animals and buildings. Human raiders flee if enough of them have been downed or killed, or if enough damage to your colony has been done. Mechanoids will persist indefinitely.
Arrival methods[edit]
Tribal-level factions can't use drop pods, so are limited to assaults.
- Assaults: Arrive at the edge of the map, either by walking or by drop pod. They may assault the colony immediately, or stage for a time before launching their attack, giving you time to prepare.
- Center drop: Raiders immediately attack via drop pod, centered on one of your colonists. There is 40% to drop on an unroofed orbital trade beacon if one is present. Drop pods can go through constructed and thin rock roofs, but not overhead mountain.
- Scatter drop: Raiders immediately attack via drop pod, which have gone "haywire" and will disperse throughout the map.
Types[edit]
- Smart: "Unusually clever" raiders will seek to enter your base while avoiding traps and turrets.
- Sappers: Sappers will mine or destroy walls to create the shortest route to a colonist's bedroom. Groups of sappers are smaller in number than the other raid types.
- Breachers: Appear with breach-type raiders, such as tribals with breach axes or termite mechanoids. Breachers will attack walls in their path indiscriminately, as opposed to sappers having a target.
- Siege: See below.
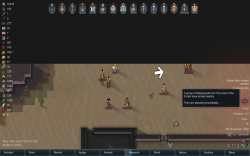
Assault

Raided by (relationship) mom!
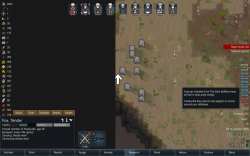
Drop pod sappers
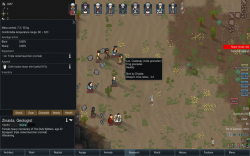
Sappers


Siege[edit]
Sieges are a special type of raid. They arrive in drop pods, along with supplies. They will construct sandbags and mortars, and will continuously be supplied with food and mortar shells. They will fire at colonists, colony structures, and other pawns they are hostile to. Sieges will directly assault the colony after a long time (a few days), if their mortars are destroyed or unbuildable, or after sufficient casualties.
It is possible to steal a critical material (like components) and prevent them from completing construction. This is largely possible with a psycaster![]() using both Invisibility and Skip, with enough heat capacity to cast both 2-3 times in a row.
using both Invisibility and Skip, with enough heat capacity to cast both 2-3 times in a row.
Strategies to force sieges to attack include the sniper rifle (watch out for other snipers), a psychic animal pulser, or your own mortars.
Infestation[edit]
Infestations come with hives and insectoids. Hives will produce insect jelly, but will rapidly create insects, too. If you don't want it to infest the whole area, muster your forces and destroy it. But beware - the bugs will defend their hive.
In order for a regular infestation to spawn, there must be an open area with the overhead mountain roof, within 30 tiles of a colony structure, and a temperature above -17 °C (1.4 °F). Light, and temperatures below -8 °C (17.6 °F) reduce the chance of infestations.
The Too Deep: Infestation is a separate event. Insects can still arrive, but this event has separate mechanics.
The Wastepack infestations is a separate event available if Biotech![]() is active. The end effect is similar, but the mechanics are different.
is active. The end effect is similar, but the mechanics are different.
Manhunter pack[edit]
A pack of scaria-infested animals have arrived, hunting for human flesh. A manhunter pack has 40% more points (i.e. 40% more "raiders") than a regular raid. When killed, scaria has a chance to instantly rot a corpse, which makes them inedible and creates rot stink. A single animal can arrive and the event will still be called a "pack".
Manhunters will roam the region, attacking any human they can path to. The animals can't enter doors, but if they see a colonist run behind a door, they will attempt to beat down the door. If left alive, they will congregate around your base for anywhere from 24 to 54 in-game hours before they all leave.

Psychic wave[edit]
Appears as Mad Animals: (Animal name). Immediately drives local wildlife insane, becoming manhunter. As opposed to a manhunter pack, these animals do not have scaria, and so won't immediately rot. No new animals are created - only animals already on the map can be affected. This fact means that psychic waves scale poorly with raid points; advanced colonies will find these events much smaller than any other major threat.
As manhunters, the selected animals will roam the region, attacking any human they can path to. The animals can't enter doors, but if they see a colonist run behind a door, they will attempt to beat down the door. Unlike with scaria, the manhunter status will end when the animals need to sleep.
This event has a variation that only affects a single animal, which is not considered a major threat.
Crashed ship part[edit]
A large piece of an ancient ship crashes nearby, along with a pack of mechanoids. The mechs will generate dormant, but will awaken when they or the ship part are attacked. While the ship part is still active, they will activate an intensifying negative effect on the map.
Defoliator ship[edit]
A crashed defoliator ship kills all wild or domesticated plants in an expanding circle, up to a radius of 100 tiles. The poison kills crops randomly, including plants grown in hydroponics basins. Crops will end up nearly impossible to grow. If the Biotech DLC is active, this ship part will also generate Pollution![]() from its center at a rate of 6~7 tiles per day.
from its center at a rate of 6~7 tiles per day.
Psychic ship[edit]
A ship part projects a psychic drone which negatively affects the mood of a specific gender. It begins low and grows progressively stronger the longer it stays. Psychic sensitivity increases or decreases the drone's effect.
The ship's is also capable of emitting psychic pulses that can drive a colonist to an immediate mental break, or nearby animals to madness.
Drone intensifies[edit]
If left alone long enough, the drone emitted from a crashed psychic ship will get worse as time goes on. Every 2.5 days the drone gets stronger, from -12 mood at the beginning up to -48 after 7.5 days.
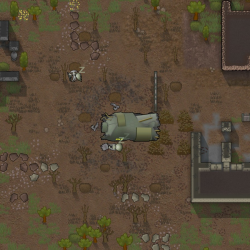
Defoliator ship
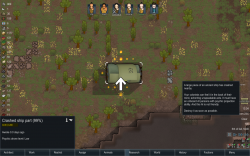
Psychic ship


Mech cluster[edit]
| This article relates to content added by Royalty (DLC). Please note that it will not be present without the DLC enabled. |
Mech clusters are similar to crashed ship parts with a more complex structure, with buildings like walls, turrets, and unstable power cells. They also spawn dormant, but can come with activators, able to wake up from proximity or over time. They can come with on-map condition causers, such as sun blockers or EMP dynamos.
Problem causer[edit]
| This article relates to content added by Royalty (DLC). Please note that it will not be present without the DLC enabled. |
A condition causer has appeared within 10 world tiles of your colony, creating a negative effect. It must be destroyed to stop the effect. Some conditions may be situationally good, such as a psychic suppressor (male) when you only have females in the colony.
Extreme weather[edit]
These events alter the environmental conditions of the colony map, only able to appear from Base Builder difficulty onward.
Flashstorm[edit]

"A freak localized storm is blasting a small area with repeated lightning strikes."
Flashstorm is a localized, intense lightning storm within a radius between 45 and 60 tiles. Active lightning will strike between every 320 ticks (5.33 secs) to 800 ticks (13.33 secs). Once it finishes, no rain can fall until 30,000 ticks (8.33 mins) has passed. This can create big fires. It lasts between 0.075 and 0.1 days, and will not reoccur for 15 days. Clicking the envelope icon offers the option to jump to the center point.
This can also be caused by the Flashstorm Psycast ![]() , but will not show up as a notification.
, but will not show up as a notification.
Toxic fallout[edit]
"A distant chemical fire has released a plume of poison over this entire region that will slowly settle out of the atmosphere. It will last for anywhere from a few days to an entire season."
Toxic fallout is a dangerous event which causes toxic buildup to any pawn not under a roof. The fallout also gives a −5 moodlet for colonists when outside. It lasts between 2.5 and 10.5 days, will not occur before Day 60 of the colony, and will not reoccur for 90 days.
Toxic buildup from toxic fallout is proportional to both Toxic Resistance and the Toxic Environment Resistance of the pawn. Animals have 50% Toxic Resistance, so buildup increases at half the rate, but exposed animals will eventually die. When animals die with toxic buildup, there is a chance, scaling with severity, for their corpse to immediately rot.
By default, toxic buildup increases at a rate of 40% per day. For humans, a moderate buildup - 40% severity, or 24 hours left outside - is enough to potentially cause permanent damage, from either dementia or carcinoma. Death happens at 100% severity. In Biotech,![]() both resistances can be gained in a number of ways, allowing counters to the effects of the fallout. These include the face mask, gas mask, detoxifier kidney, detoxifier lung and several genes.
both resistances can be gained in a number of ways, allowing counters to the effects of the fallout. These include the face mask, gas mask, detoxifier kidney, detoxifier lung and several genes.
Excluding some special cases (Anima tree![]() , Anima grass
, Anima grass![]() , Gauranlen tree
, Gauranlen tree![]() , Gauranlen pod
, Gauranlen pod![]() , Polux tree
, Polux tree![]() ), all plants will wither during the fallout, trees included. Every in-game hour, the affected plants will receive between 48.9 and 66.1 points of damage [57.51667 base damage ±15%]. Crops can be protected under a roof, but without a sun lamp, they'll rot anyways. Insectoids and mechanoids are fully immune.
), all plants will wither during the fallout, trees included. Every in-game hour, the affected plants will receive between 48.9 and 66.1 points of damage [57.51667 base damage ±15%]. Crops can be protected under a roof, but without a sun lamp, they'll rot anyways. Insectoids and mechanoids are fully immune.
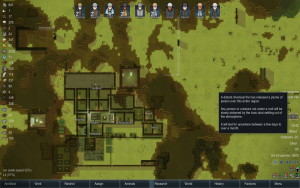
Toxic fallout

Colonist acquired Dementia at 80% extreme level


Volcanic winter[edit]
"A distant supervolcano has erupted and begun spewing millions of cubic kilometers of ash into the atmosphere. Ash in the atmosphere will obscure the sun. Temperatures will drop and plants will suffer for lack of sunlight. It could pass in a few weeks, or it might last many months."
Volcanic winter lowers the temperature and natural light, which in turn weakens solar generators and slows plant growth. They also appear to significantly reduce the inflow of wildlife (observed in a Temperate Forest, 300x300, very few animals came in during Spring-Summer when there would normally be many). This can easily lead to meat shortage and famine if you do not have sufficiently large farms for your colony. Volcanic winters will last between 7.5 and 40 days, will not occur before Day 60 of the colony, and will not reoccur for 140 days.
To be specific, the temperature is reduced by 7 °C (44.6 °F) and the light by 30% over the course of 50,000 ticks (13.89 mins). The wildlife density is cut by half, and pawns can no longer enjoy their time outside.
Random Events[edit]
These are the 3rd set of events able to be triggered by the storyteller. Internally, Random Events are classified as either good, bad, or quest.
Quests[edit]
Quests are a class of event that provide conditions to be met or actions to be performed to gain a reward. There are a wide variety of quests, which are listed on the quest page.
Good[edit]
Ambrosia sprout[edit]

A grove of the mysterious ambrosia bush has sprouted nearby! If you wait for the plants to grow, you'll be able to harvest the delicious, pleasurable, and slightly addictive fruit.
Ambrosia bushes are the only way to harvest ambrosia, a safe mood boosting social drug. A good way to harvest them is to draw a growing zone over them, but forbid sowing. Colonists will then automatically harvest the bushes when they are fully grown.
It can only happen in the following biomes:
Animals join[edit]
Tamed dogs or farm animals from off-map join your colony.
Animal self-tamed[edit]

A random animal on the map becomes tame, and immediately joins the colony. The frequency of self-taming events is unrelated to the number of animals on the map, provided there is at least one. This means in a tundra biome with one snowhare you're just as likely to get a self-taming event as in a tropical swamp populated with dozens of animals. Previously tamed animals can self-tame, and will retain the name and all training they previously had.
For pen animals, you must rope them into a pen or to a caravan hitching spot or the animal will eventually run off the map, though usually this is not urgent. For zoneable animals, you should check the "Animals" tab and assign the animal to an appropriate zone, unless you want to let it move unrestricted. If you are dangerously low on food, be aware that if a zoneable animal self-tames and there is no food in the environment, it will run inside your base and eat your food stores when it gets hungry.
Aurora[edit]
An aurora lights up the night sky, giving a +14 mood boost to anyone who is outside watching. While in real life it only happens near the poles, on the rimworlds it can happen anywhere regardless of latitude. It ends at day and otherwise lasts from 0.125 to 0.35 days.
Despite the event text stating that it will "make the night brighter", it does not actually affect the light level.
Cargo pods[edit]

From time to time, cargo pods will fall out of orbit, containing a random amount of single type of resource. The remains of the pods become steel slag chunks, which can be refined into usable metal at an electric smelter. The pods have a chance of crashing through the roofs of any buildings, damaging any nearby furniture, structures or any pawn they land on.
Herd migration: (Animal)[edit]

A large herd of animals is passing through the area. They won't attack unless provoked. They pass by quickly, so you must be quick if you want to hunt or attempt taming them.
This event only occurs in the following biomes:
Party[edit]
One of your colonists will throw a party around a party spot, or if unavailable, a gather spot (table or campfire). Colonists will continually get mood buffs the longer they attend a party.[Detail] Each stack adds +0.8 to mood, lasts 10 days and stacks up to 10 times, for a max buff of +8 mood. In addition, a party provides many social opportunities. They will usually have beers and smokeleaf joints, if available, and eat meals even when not hungry.
Pawns that don't attend won't get mood buffs. Players may have to draft and undraft pawns to get them out of work. If too many pawns, or the hosting pawn are drafted at once, or if a raid happens, then the party will be called off.
Psychic soothe[edit]

When this event triggers, the soothe gives a positive mood modifier (+16 for normal colonists, more or less depending on the Psychic Sensitivity) to all colonists of a randomly chosen sex. It can be considered the opposite of the Psychic Drone, but does not have different levels of severity. It lasts between 1.5 and 3.0 days and will not reoccur for 15 days.
(Trader type)[edit]
This event, without a faction mentioned, occurs when an orbital trade ship passes near the colony and you have a powered comms console. Players may trade to obtain resources or weapons, or alternatively sell excess items for silver, which is always accepted by traders. Note that orbital trade ships can appear even when the comms console is turned off, so check the console during a solar flare.
You need to build orbital trade beacons before contacting them so you can beam silver and items up to the ship to actually carry out transactions. You can still check the items for sale even without them however.
(Trader type) from (Faction)[edit]
This event with the faction name mentioned means the traders are terrestrial. Trader caravans from other non-hostile factions can stop by your colony, whether specifically requested via the comms console at a hit to good will or randomly on their own with no penalty.
Transport pod crash[edit]

A downed and injured occupant falls from the sky, containing members of a faction or neutral, unaffiliated spacers. A friendly or neutral occupant can be rescued to a medical bed, while a hostile member must be put into a prison bed.
The pawn can also be a xenotype![]() that doesn't have any factions on the planet.[Detail needed]
that doesn't have any factions on the planet.[Detail needed]
Once healed, non-hostile crash victims will either join your colony out of gratitude, or walk away to return to their faction. You can instead capture a non-hostile person, but their faction (if not spacer) will turn hostile.
Paralytic abasia[edit]
| This section relates to content added by Royalty (DLC). Please note that it will not be present without the DLC enabled. |
A transport pod can crash with a person with paralytic abasia, a disease which prevents movement until cured (usually after 40 days). Unlike regular transport pods, the person will directly ask to join the colony. If you refuse, then colonists will get the same penalties as if you banished another colonist.
Baby[edit]
| This section relates to content added by Biotech (DLC). Please note that it will not be present without the DLC enabled. |
A transport pod may crash with a baby instead of the regular occupant, and will always appear as a friendly faction/neutral refugee/unaffiliated. You can choose to ignore it and let it starve to death, or adopt the baby by selecting it and click "Adopt". Rarely, the corpse of the baby's parent can also appear next to it, still in pristine condition.
Wanderer joins[edit]
A random person will forcefully try and join the colony. You have 24 hours to accept or reject them. Accepting will have them appear on the world map. Rejecting will give the same penalties as if you had banished a colonist. Unless it'd be dangerous to enter your colony, there is no reason not to accept the wanderer, see their stats, and then decide to keep or banish them.
With Ideology![]() , the colonist that joins the colony will have a randomized Ideoligion. This event can also occur at 50% rate if an Ideoligion's event result set for this event is "Beautiful/Fun/Good / Unforgettable", with said colonist with the same Ideoligion as the masses of the colonist in the colony.
, the colonist that joins the colony will have a randomized Ideoligion. This event can also occur at 50% rate if an Ideoligion's event result set for this event is "Beautiful/Fun/Good / Unforgettable", with said colonist with the same Ideoligion as the masses of the colonist in the colony.
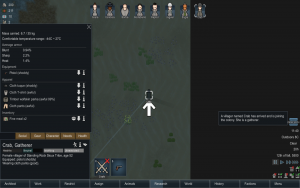
Common character
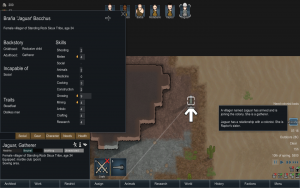
Related character


Wild (wo)man wanders in[edit]
A random person with no faction wanders into your colony and will mill about the map. You have the option to Tame this person with a minimum Animals skill of 7. Doing so will convert them to into a completely normal colonist. Sometimes, they may not be able to resist the harshness of nature and may fall unconscious (ex: Toxic Fallout, extreme temperatures), allowing you to rescue them like transport pod crash victims. They also have the same hunger needs as regular humans, and if they do not find animals to hunt or wild plants (or simply do not want to) they can walk into your base and eat your food, which can be an annoyance. Arresting them will not allow you to recruit or enslave![]() them like regular prisoners, they must be tamed or rescued.
them like regular prisoners, they must be tamed or rescued.
Wild humans have a 50% chance of attacking when harmed, and 10% if taming fails.
These wild (wo)men may have random Ideoligion with Ideology.
Unlike other animals, wild people will not flee from gunfire. Wild people can hunt human pawns for food like a predator, regardless of whether they are cannibals or not. Wild people who are incapable of violence will not hunt at all, but may still become manhunter when provoked.

Wild man wanders in
Wild man joins without "taming"


Traveler Visit[edit]
Occasionally, one or more members of a friendly faction will arrive, just passing through. They'll enter at one edge of the map and proceed across the map. They'll exit the map upon reaching another edge.
A drafted colonist can be directed to capture (arrest) one of the travelers. However, once the arresting colonist reaches the target, that entire faction will immediately turn extremely hostile, dropping to -76 Goodwill. This shift includes any other members of the same Faction currently there.
Visitor(s)[edit]
Friendly faction members may stop by your settlement. Occasionally, they will have a few goods to trade. Like a regular trader they will mill about the player's colony for a while. Unlike a regular trader, they don't have many goods with them, nor do they have as much silver to buy your goods. Visitors possess no higher purpose otherwise, but will fight mutual enemies.
Sometimes there will be a singular visitor. In this case, the game will notify you of the backstory of that visitor.
Royal Tribute Collector[edit]
| This section relates to content added by Royalty (DLC). Please note that it will not be present without the DLC enabled. |
If you are not hostile to the Empire, Royal Tribute Collectors will visit the colony approximately twice a year. Tribute collectors are essentially Empire-only trade caravans that exclusively accept gold and prisoners in exchange for Honor.
Gauranlen pod sprout[edit]
| This section relates to content added by Ideology (DLC). Please note that it will not be present without the DLC enabled. |
A Gauranlen pod has sprouted nearby! Harvest it to collect a Gauranlen seed. This special seed can be used to plant the majestic Gauranlen tree. Your colonist can connect with Guaranlen trees and make them spawn resources and helpful dryads to work or fight for you.
A pod will appear somewhere with the current map. Harvesting it yield 1-2 Gauranlen seed. This event occurs roughly every 60 days in every biome except Ice Sheets and Sea Ice, and this time is decreased to roughly every 30 days for tree connectors. This event can also occur if an Ideoligion's ritual result is set to trigger this event and performing the ritual receives a "Beautiful/Fun/Good/Unforgettable" quality.
Polux tree sprout[edit]
| This section relates to content added by Biotech (DLC). Please note that it will not be present without the DLC enabled. |
A polux tree may appear whenever there is enough pollution around. It will consume and clean up said pollution, but will not do so if it or its roots are under a roof.
Bad[edit]
Beavers![edit]
A group of ravenous tree-munching alphabeavers appears at the edge of the map. This only occurs in the arid shrubland and tundra, and only when the outdoor temperature is above the alphabeaver's minimum comfortable temperature of -40 °C (-40 °F). It will not reoccur for 30 days.
Beavers will act like any other animal. But due to their unique diet and extreme hunger, beavers will continually eat trees and Saguaro cacti they can reach, including anima trees![]() , gauranlen trees
, gauranlen trees![]() , polux trees
, polux trees![]() and any trees you're farming. Alphabeavers will not and cannot eat the
and any trees you're farming. Alphabeavers will not and cannot eat the ![]() wood item, wooden buildings, or any other item made out of wood.
wood item, wooden buildings, or any other item made out of wood.
The beavers will continue eating until there are no trees left, unless you eradicate them or they're driven off the map by temperature.
Birthday[edit]
Character gains an age-related illness, such as bad back or cataracts. They may be cured by using the healer mech serum, luciferium, a biosculpter pod![]() , or the Scarless gene
, or the Scarless gene![]() . Some may be 'cured' by replacing the affected parts with bionics.
. Some may be 'cured' by replacing the affected parts with bionics.
Due to age or a pre-existing health condition, they can also have a heart attack.
Blight[edit]

Blight is a disease that infects domesticated plants with a growing period shorter than 15 days. Blighted crops will not grow or yield anything when harvested, and the blight will spread to other nearby plants within 3 tiles. These plants must be cut in order to avoid further spread. Trees, wild, decorative plants, and devilstrand mushrooms are immune to blight.
Blight starts on one of your crops, at 10% severity, affecting 20% of your plants (40% initial plants affected has been witnessed in December 2020). It will progress slowly once plants are infected, and once it reaches 28% it can spread to nearby plants within a 4-tile radius.
It will not reoccur for 30 days.
Disease[edit]
Colonists (including prisoners and slaves![]() ) or animals will gain a random disease. Biome influences both the amount of disease and its selection. Multiple pawns can get a disease at once, but diseases never spread between pawns. Disease events are controlled separately from other events by your storyteller.
) or animals will gain a random disease. Biome influences both the amount of disease and its selection. Multiple pawns can get a disease at once, but diseases never spread between pawns. Disease events are controlled separately from other events by your storyteller.
Sickly pawns will get sick with a MTB of 30 days, independently of the rest of your colonists.
Eclipse[edit]
A moon has moved in front of the sun, causing an eclipse. Without light, solar generators won't function, and outdoor crops stop growing. It lasts between 0.75 and 1.25 days.
If reliant on solar power, make sure to have batteries for times like these, or an eclipse raid can be extra threatening.
Pawns with the Eclipse: Beautiful precept![]() will receive a +5 moodlet for seeing an eclipse.
will receive a +5 moodlet for seeing an eclipse.
It will not reoccur for 15 days
Heat wave[edit]
| This section is a stub. You can help RimWorld Wiki by expanding it. Reason: Needs details. What's the chance for a fire to occur?. |
A heat wave sweeps the colony, driving outdoor temperatures unusually high for 1.5 and 3.5 days. To be precise, the temperature will increase by 17 °C (62.6 °F) over 12000 game ticks (4.8 in-game hours). There is also a chance for a fire to randomly appear on the map, which can quickly spread. It only occurs when the map's summer temperature is at least 20 °C (68 °F), and will not reoccur for 30 days.
The major risks are coolers failing to freeze food, and heat stroke to your colonists and animals. Summer clothing like cowboy hats and tribalwear can mitigate the heat, and passive coolers can help make indoor temperatures bearable.
Do note that an while this event remains active, the colony will not trigger the events Cold Snaps, Volcanic Winter, nor additional Heat Waves. The one exception are events triggered by quest, which will apply regardless.
Cold snap[edit]
A cold snap strikes the colony, driving outdoor temperature unusually low for 1.5 and 3.5 days. To be precise, the temperature decreases by 20 °C (68 °F) over 12000 game ticks (4.8 in-game hours). It only occurs when the map's summer temperature is in the range of 0 °C – 15 °C (32 °F – 59 °F), and will not reoccur for 30 days. Colonists will complain about the cold, especially sleeping in it if their rooms are not properly heated.
While this is generally good for item preservation, it can kill off crops, influence colonist moods and cause hypothermia if colonists or animals stay in non-heated areas for a prolonged time. It also renders most of the plants in the area inedible (unless when it happens in warmer areas in which some plants are still edible), potentially causing tame animals to starve to death and wild ones to leave the map. With no other food source, wild predators may attack colonists and tame animals while they are outdoors. Snowing may also happen, depositing thick snow that can slow down outdoor movement significantly.
Jackets, dusters, parkas and tuques provide cold insulation for colonists, protecting them while they're awake, though they don't prevent mood loss caused by sleeping in cold areas.
Do note that an while this event remains active, the colony will not trigger the events Heat Waves, Volcanic Winter, nor additional Cold Snaps. The one exception are events triggered by quest, which will apply regardless.
Mad animal[edit]
A single random animal on the map turns manhunter, like a psychic wave. The insane animal will charge toward the nearest human anywhere on the map, attacking any other animal or obstacle (doors, fences, barricades, etc.) blocking its way. If the "nearest" colonist changes, the animal may change its focus to that target.
Any animal can be dangerous to a colonist, but multiple colonists can usually take them out. Large animals, as well as the explosive boomalope and boomrat, are bigger threats.
Psychic drone[edit]
'Drone' in this case does not refer to "Unmanned Aerial Vehicle" but instead "To produce a low-pitched hum or buzz." A psychic drone affects all colonists of a randomly chosen gender, giving a strong negative moodlet. The drone can vary in severity, from low (-12 mood) to extreme (-40 mood). Psychic Sensitivity will multiply the effect on the drone. It lasts between 0.75 and 1.75 days and will not reoccur for 15 days.
Colonists have no choice but to endure it, as the point of origin is off-map. Psychic foil helmets, drugs, and other mood-enhancers can help deal with the effects. Animals are not affected.
Solar flare[edit]
Solar flares cause all electrical devices to stop working for its duration, from 0.15 to 0.5 days. Wood-fired generators and chemfuel generators will still burn fuel during this time.
- Colonies that rely on turrets for defense will become vulnerable to raids.
- Heaters and coolers will stop working. In extreme temperatures, crops will die and colonists can be at risk of heatstroke or hypothermia. Campfires and passive coolers are low-tech options that work even in a solar flare.
- Crops in a hydroponics basin will rapidly degrade, regardless of the temperature. It's recommended to quickly harvest any crops that can't be saved before they die.
- Occasionally an orbital trade ship may arrive during the event, so it is wise to check out the Comms Console as soon as the event ends or risk getting the ''<trader> has left comms range" notification while unaware of their presence. If a ship leaves during a solar flare, you will be notified that the trader has left, although this is only a minor message in the upper right of the screen.
- The colony is immune to the effects of a solar flare while also undergoing unnatural darkness

Due to its length, most of the adverse effects are manageable.
Zzztt[edit]
This event can occur anytime a power conduit has energy flowing through it. The conduit may suffer a fault, causing a short circuit. They may also occur if certain objects are left unroofed and are exposed to rain or snow. Short-circuits not caused by rain/snow will not reoccur for 8 days. Short circuits do not affect hidden conduits, meaning zzztts can be avoided entirely by simply having all applicable buildings under roofs and having a network made entirely of hidden conduits.
The following buildings short circuit due to weather:
- Sun lamp
- Tube television
- Flatscreen television
- Megascreen television
- Comms console
- Multi-analyzer
- Vitals monitor
- Battery
- Electric tailor bench
- Electric smithy
- Machining table
- Electric stove
- Electric smelter
- Biofuel refinery
- Fabrication bench
- Hi-tech research bench
- Electric crematorium
- Heater
- Lightball

- Loudspeaker
- Autobong
Short circuits will either result in a fire, or, if any batteries are connected to the circuit and contains at least 20Wd, a fiery explosion centered on the tile, that increases with energy stored. The explosion deals 10 Flame damage and setting objects on fire. If the explosion radius is greater than 3.5 tiles, a second explosion of 30% radius deals 50 Bomb damage, which can extinguish fires. The fault will also discharge all stored power in batteries in the process.
The explosion radius is controlled by the following equation:
| Explosion Radius = clamp( sqrt(Sum of all stored power) * 0.05, 1.5, 14.9) |
Or in other words, the radius will be at least 1.5 tiles, and at most 14.9 tiles, with a bomb explosion of 4.5 tiles. This occurs when a total of 90,000 Wd is stored. Bomb explosions can occur beyond once 4,900 Wd are stored.
| Explosion radii per number of batteries filled |
|---|
Unconnected batteries, such as through an open switch or on separate power network, will not be affected. Power networks which contain only batteries and no conduits will not experience this event. Power networks which contain only conduits will only have a single tile on fire, as there's no stored power to be discharged.
Transport pod crash (Ghoul)[edit]
| This section relates to content added by Anomaly (DLC). Please note that it will not be present without the DLC enabled. |
A transport pod may crash with a ghoul instead of the regular occupant, and will always appear as unaffiliated. They will always appear as hostile and will initially be in shock, but if left ignored, will immediately attempt to attack anything or anyone nearby after a while.
Gray pall[edit]
| This section relates to content added by Anomaly (DLC). Please note that it will not be present without the DLC enabled. |
A fog of eerie, gritty dust settles on the map. Colonists standing in an unroofed area will receive a −6 gray pall exposure moodlet, while colonists under a roof will have −3 gray pall. The pall is otherwise not dangerous and disappears after 1-2 days.
Incidental Events[edit]
- For a detailed list of these events, see Events/Incidental.
These events aren't triggered by the storyteller. Instead, they come from various other game mechanics. For purposes of the wiki, these are divided in good, bad, faction, informational, and social events.
World incidents[edit]
- For a guide to survive these events, see World Quests Guide.
These are events related to/only triggered on the overworld.
Attack begun[edit]
This notification will appear when a caravan has arrived at a settlement chosen for attacking.
Bandit camp opportunity[edit]
Some ruffians are causing trouble nearby and other factions will pay you to wipe them out.
The bandit camp will time out and are weaker than regular enemy bases.
Destroying them increases goodwill by 8 and returns a payment worth 2000 to 3000 worth of silver, whether it consists of items or silver itself.
Caravan ambushed / (manhunters)[edit]
While traveling, one of your caravans are attacked. The game will give you a mini map to defend it.
The attackers can be an enemy faction lying in ambush or a rampaging manhunter pack your caravan unfortunately trespasses upon.
Caravan battle won[edit]
This event will tell you if your people won their fight, and can reform the caravan on the world map.
Caravan arrived at (Location)[edit]
This is a simple notification that your caravan has arrived at their destination.
Caravan lost[edit]

All human members of your caravan have died, or have been downed on an event map. Anything carried by the caravan, including animals, will be lost to the wild.
If colonists were downed but not killed while fighting human enemies, it is possible for some of them to appear later in a Prisoner Rescue Quest.
Caravan meeting by (Caravan ID)[edit]
This is a pop up window rather than an event with envelope icon. While away from your bases, your caravans may randomly encounter other traders out in the world who would be happy to trade with you. Of course, you also have the option to attack them. Be careful, trade caravans are usually well defended.
Caravan ready[edit]
Once you've designated a caravan, you'll get this notification once all of the colonists, prisoners, animals and items have been assembled and left the map. It is now ready to send to other settlements or form another settlement of your own, if you've enabled multiple settlements in the game's settings.
Demand[edit]
A hostile faction approaches your caravan and demand that you give them items and/or hand over members as slaves. If you refuse, they will proceed to assault the caravan.
You can see their number when they are demanding you hand over items.
Peace talks[edit]

A hostile faction leader decides to drop his weapons and offers to talk things out for once. The offer expires after 15 days if ignored. Pirates will never attempt peace talks.
To participate, you will need to send a caravan with a capable negotiator. Once the destination is reached, the most capable negotiator in your caravan will proceed to talk with the leader to hopefully improve relations.
There are several outcomes of the incident, each being a sub-event of its own. No matter the outcome, your negotiator will always gain social skill.
| Result | Description | Base Weight |
|---|---|---|
| Peace talk triumph | The peace talks were very successful, giving a great boost to relations from 50 to 75. In addition, the faction will give a farewell gift worth between 500 and 1500 silver. Despite your triumph, if you don't manage to bring relations above 0, they will still remain hostile. |
0.1 |
| Peace talk success | The talks were a success, and relations between the factions have warmed somewhat, from 25 to 75. | 0.55 |
| Peace talk flounder | The talks were neither successful nor a failure, and relations remain unchanged. | 0.2 |
| Peace talk backfire | The peace talks backfired, and relations have gotten worse than they started, from -10 to -50 relations. | 0.1 |
| Peace talk disaster | The peace talks have failed so miserably that the faction hates you a lot more now, with a -25 to -75 damage to relations, as well as instantly turning hostile if they aren't already. In addition, the angered faction sends a group of attackers after your negotiating party. | 0.05 |
Outcome chances[edit]
The actual outcome chances are dependent on the negotiator's Diplomacy Power stat, after going through a simple curve. To do this, the game calculates the bad outcome factor, of the negotiator first.
- At 0% power, the bad outcome factor is 4.
- At 100% power (healthy, lvl 10 Social), the bad outcome factor is 1.
- At 150% power (healthy, lvl 20 Social), the bad outcome factor is 0.4.
The new weight of each outcome is calculated afterwards.
- Triumph = 0.1 * ( 1 / Bad Outcome Factor)
- Success = 0.55 * ( 1 / Bad Outcome Factor)
- Flounder = 0.2
- Backfire = 0.1 * Bad Outcome Factor
- Disaster = 0.05 * Bad Outcome Factor
The sum total of the new weights is then calculated.
Finally, the probability of each outcome is calculated:
Probability of each outcome = New Weight ÷ Sum Total of Weights
Take a level 15 Social negotiator as an example:
- The diplomacy power is 125%, corresponding to a bad outcome factor of 0.7.
- The new weight of each outcome, to 3 d.p.:
- Triumph = 0.1 * ( 1 / 0.7) = 0.143
- Success = 0.55 * ( 1 / 0.7) = 0.786
- Flounder = 0.2
- Backfire = 0.1 * 0.7 = 0.07
- Disaster = 0.05 * 0.7 = 0.035
- The sum total of new weights is calculated:
- 0.143 + 0.786 + 0.2 + 0.07 + 0.035 = 1.234
- Finally, the probability of each event, to 2 d.p.:
- Triumph = 0.143 / 1.234 = 11.58%
- Success = 0.786 / 1.234 = 63.69%
- Flounder = 0.2 / 1.234 = 16.21%
- Backfire = 0.07 / 1.234 = 5.67%
- Disaster = 0.035 / 1.234 = 2.84%
Rescuee joins[edit]
Should you succeed in rescuing a prisoner or you offer help to an incapacitated refugee, he or she will immediately join your faction.
Sub-events[edit]
These aren't quest events on its own, but may happen during other world events such as Incapacitated Refugee or Item Stash Opportunity.
Ambush[edit]

Enemies may enter the minimap a little while after your colonists arrive or suddenly appear near the objective when your pawns draw close to it. It's even possible for animals to lie in wait.
Sleeping mechanoids[edit]
When the map generates, sleeping mechanoids will be present near the objective. Going too close to them will awaken them, making them attack. While they are present, you cannot manually reform the caravan as the game notifies you that there are hostiles in the area, but you can still leave through the edges.
Game endings[edit]
When these happen, they signify that your game has ended, one way or another.
Game over[edit]

This happens when all your colonists are either dead, missing, or left the planet. The game will show a Letter which says that everyone is gone or dead, and allows you to return to the main menu. You can continue playing, and someone may find a use for the wreckage of your base.
Should you decide to continue playing, events will continue to happen, which can affect the ruined base but not anyone. You can strike lucky and roll 'Wanderer joins' or 'Refugee chased' events, giving you a colonist to rebuild from.
Post 1.4, the game over letter has been updated with the option to generate multiple new colonists as a whole group. This event is referred to in the scenario editor as the Wanderers (plural) Join incident, although it always occurs, only manually. This works just the same as the beginning colonist selection, including specifying age range and xenotypes and sharing your original ideology.
Planetkiller[edit]

"An interstellar planetkiller weapon is approaching this planet. It will smash the planet apart like a rifle bullet hitting an egg, annihilating all life."
This event can only happen by configuring the starting scenario.
When it happens, the screen will fade to white, and a message will show that the planet is obliterated by a planetkiller and that you did not survive.
Unlike your regular 'Game Over', you cannot continue the game. Saved games (including permadeath) can be continued from their last saves, however.
Ending - The Archonexus Core[edit]
For specifics, see Endings#The_Archonexus.
Once it happens, your colony is succesfully noticed by an archotech. What happens next is left to especulation.
Similar to the Planetkiller and unlike other endings, you cannot continue the game once reaching this ending. Saved games (including permadeath) can be continued from their last saves, however.
Legacy events[edit]
Events from previous versions of RimWorld, now removed.
Bonded animal's death[edit]

Both of these bonded death events were simplified into the Death: (Pawn) event.
An animal with a bond to a colonist dies, affecting that colonist's mood negatively. Enemies may directly target your animals during attacks. Enemies, turrets or even your own colonists can even hit them unintentionally during shootouts, especially animals trained for Release and checked to follow your drafted colonists in the Animals tab. Wild predators may hunt and kill your animals, including bonded ones. Bonded animals can also fall into traps. It can even occur intentionally by slaughtering, euthanizing or manually drafting and attacking the bonded animal.
Bonded master's death[edit]
Both of these bonded death events were simplified into the Death: (Pawn) event.
The inverse of a bonded animal's death. This time, it's the master who dies, through causes such as enemy raids, disease or large wild predators getting hungry.
When this happens, any animal that is bonded to the master will have a mental break. It can be a less dangerous one such as a dazed wander, or a more dangerous one such as a berserk rage.
This is one of the only situations where animals can have non-manhunter mental breaks.
Breakdown: (Machine)[edit]
In previous versions, this was its own event. Now it's just a notification.
One of your machines will break down and will not work until repaired with a component. If this happens to a hydroponics basin, any crops in it will wither and die unless repaired immediately.
This only applies to machines using electricity.
Tornado[edit]
A tornado has touched down in this region, and will proceed to wreak havoc on anything in its way. There is small chance it may spawn at the map borders and eventually leave the map.
Tornadoes rapidly deal damage to any structure or item that is right beneath it. Any pawn underneath will rapidly receive scratches from the random objects blowing about in the wind.
Naturally forming tornadoes are exclusive to Beta 18. You can still use the Tornado generator to spawn them in for defense purposes.
Event data[edit]
Note: events that give colonists, such as wanderers or transport pod crashes, are affected by the storyteller's population intent factor. They become more common if you have few colonists, and rare if you have many.
| Category | Name | Common Name | Chance | Favorability | Min Time Before Repeat (days) |
|---|---|---|---|---|---|
| Disease | Flu | Flu | varies by biome | Bad | varies by biome |
| Disease | Plague | Plague | varies by biome | Bad | varies by biome |
| Disease | Malaria | Malaria | varies by biome | Bad | varies by biome |
| Disease | SleepingSickness | Sleeping Sickness | varies by biome | Bad | varies by biome |
| Big Threat | RaidEnemy | Raid | 9.0 | Bad | 0 |
| Big Threat | AnimalInsanity | Mad Animals!: (Animal name) | 1.0 | VeryBad | 1 |
| Big Threat | ShipPartCrash | Psychic ship | 1.5 | Bad | 30 |
| Big Threat | ManhunterPack | Manhunter pack | 2.0 | Bad | 15 |
| Big Threat | Infestation | Infestation | 2.8 | Bad | 20 |
| Special | RaidFriendly | Friendlies | 3 | Good | 0 |
| Small Threat | AnimalInsanitySingle | Mad animal | 5 | Bad | 3 |
| Small Threat | ColdSnap | Cold snap | 3 | Bad | 30 |
| Small Threat | HeatWave | Heat wave | 3 | Bad | 30 |
| General Bad | Beavers | Beavers! | 1 | Bad | 15 |
| General Bad | Eclipse | Eclipse | 3 | Bad | 30 |
| General Bad | SolarFlare | Solar flare | 1.5 | Bad | 30 |
| General Bad | PsychicDrone | Psychic drone | 1 | Bad | 30 |
| General Bad | ShortCircuit | Zzztt... | 1.2 | Bad | 15 |
| General Bad | CropBlight | Blight | 2.5 | Bad | 8 |
| General Bad | ToxicFallout | Toxic fallout | 0.25 | Bad | 180 |
| General Bad | VolcanicWinter | Volcanic winter | 0.11 | Bad | 280 |
| General Good | TraderArrivalGeneral | (Trader type) | 13 | Good | 0 |
| General Good | TraderArrivalSlaver | Slaver | 4.5 | Good | 0 |
| General Good | TravelerGroup | Travelers | 8 | Good | 0 |
| General Good | VisitorGroup | Visitor(s) | 8 | Good | 0 |
| General Good | WandererJoin | Wanderer Join | 0.4 | VeryGood | 0 |
| General Good | ResourcePodCrash | Cargo pods | 6.0 | Good | 0 |
| General Good | RefugeePodCrash | Transport pod crash | 1.5 | Good | 0 |
| General Good | PsychicSoothe | Psychic soothe | 1.0 | Good | 30 |
| Neutral | RefugeeChased | Refugee Chased | 2.5 | Neutral | 15 |
| Biome Name | Flu | Plague | Malaria | Sleeping Sickness |
Fibrous Mechanites |
Sensory Mechanites |
Gut Worms |
Muscle Parasites |
Organ Decay |
|---|---|---|---|---|---|---|---|---|---|
| Arid Shrubland | 100 | 100 | 0 | 0 | 30 | 30 | 60 | 60 | 10 |
| Desert | 100 | 100 | 0 | 0 | 30 | 30 | 60 | 60 | 10 |
| Extreme Desert | 100 | 80 | 0 | 0 | 30 | 30 | 40 | 40 | 10 |
| Boreal Forest | 100 | 100 | 0 | 0 | 30 | 30 | 50 | 50 | 10 |
| Tundra | 100 | 80 | 0 | 0 | 40 | 40 | 30 | 30 | 10 |
| Ice Sheet | 100 | 80 | 0 | 0 | 30 | 30 | 0 | 0 | 10 |
| Sea Ice | 100 | 80 | 0 | 0 | 30 | 30 | 0 | 0 | 10 |
| Temperate Forest | 100 | 100 | 100 | 0 | 30 | 30 | 50 | 50 | 10 |
| Tropical Rainforest | 100 | 100 | 160 | 140 | 30 | 30 | 80 | 80 | 10 |
| Biome Name | Mean Time Between Diseases |
Flu | Plague | Malaria | Sleeping Sickness |
Fibrous Mechanites |
Sensory Mechanites |
Gut Worms |
Muscle Parasites |
|---|---|---|---|---|---|---|---|---|---|
| Arid Shrubland | 60 | 228 | 228 | 0 | 0 | 760 | 760 | 380 | 380 |
| Desert | 80 | 304 | 304 | 0 | 0 | 1013.33 | 1013.33 | 506.67 | 506.67 |
| Extreme Desert | 90 | 288 | 360 | 0 | 0 | 960 | 960 | 720 | 720 |
| Boreal Forest | 50 | 180 | 180 | 0 | 0 | 600 | 600 | 360 | 360 |
| Tundra | 80 | 256 | 320 | 0 | 0 | 640 | 640 | 853.33 | 853.33 |
| Ice Sheet | 80 | 33.33 | 26.67 | 0 | 0 | 10 | 10 | 0 | 0 |
| Tropical Rainforest | 30 | 216 | 216 | 135 | 154.29 | 720 | 720 | 270 | 270 |
Version history[edit]
- 0.0.245 - Electrical devices now short-circuit and cause fires if left out in the rain while running.
- 0.8.657 - Beavers! event added
- 0.11.877 - Toxic fallout, Volcanic winter, Chased refugee, Psychic sooth, Manhunter pack events added. Manhunter pack is exclusively made up of wargs.
- 0.12.906 - Manhunter packs can use animals besides wargs. Farm Animals Wander In, Self Tame, Poison ship and Flashtorm events added. Animals join is exclusive to farm animals at this point.
- 0.12.910 - Poison ship now only drops one ship part instead of 2-3.
- 0.12.914 - Flashtorm are much less intense
- 0.14.1236 - Fixed many events never firing. Threat cycle event maker will no longer queue events it doesn't have the points to fire.
- 0.14.1241 - Toxic fallout, flashstorm and volcanic winter are now disabled in Free Play difficulty. Toxic fallout and volcanic winter are now rarer.
- 1.1.0 - Pawns now sometimes take the family name of their partner upon marriage
- 1.1.2654 - Increase toxic fallout earliestDay from 20 to 60. Increase volcanic winter earliest day from 30 to 60.
- 1.3.3066 - Fix: The Alphabeaver event will still happen even if the outdoor temperature is below their minimum comfortable temperature.
- 1.4.3523 - Fix: Stranger in black can have 0 shooting skill.